Showing posts with label decorating. Show all posts

Sunday, February 21, 2016

Cake of the... well, it's been a few months, hasn't it?

       So, it turns out that maintaining a new business AND a regularly kept blog is a real challenge! I apologize for the lengthy delay since my last post. If you want more frequent updates, like us on Facebook and follow our instagram account, I'm on those all the time!
     So, let's do a recap of some of my favorite cakes that I've decorated recently. Now, it should be noted, that some of these are not my original design, so I don't claim real ownership to all them. However, they are almost always tinkered with, if they are not my original concept.
      Without further delay, here are some of my favorite new cakes!

     This pretty little cake was for a classmate of mine. She was celebrating her adorable baby's first birthday! The theme was "Alice in Wonderland" and I loved the idea of doing a cake that wasn't just your every day topsy turvy, mad hatter take. This cake was not an original design, but I did alter it from being a 5 tiered wedding cake, to being a little more suitable for a baby's 1st birthday. I was really happy with how it came out.
      The DJ cake was a cute little birthday cake I made for one of our shop's neighbor's. She was celebrating around Thanksgiving, so the cake was her favorite fall flavor, pumpkin cake with cinnamon cream cheese icing. Sadly, in a sitcom-worthy twist, it turned out that one of her party guests accidentally SAT ON THE CAKE! That's why you always take a photo before it leaves the shop!


     These next cakes were made for our Valentine's Day store window. I had a lot of fun making pretty, love-inspired cakes. I adore the simplicity of the pennant cake and I think it could work for a lot of really cool weddings. The "Be Mine" cake allowed me to play around with painting and developing a deep, rich tone of red and gold on the bottom tier.
I even snuck in our initials into the window by "carving" into the birch bark of our rustic wedding cake. It features some of my favorite flowers, peonies and tulips.

    Believe it or not, this brightly colored cake was actually for a baby shower! The mom-to-be has a lot of love for Mexican art and textiles, so her sister selected them as inspiration for the cake. I LOVE the idea of a baby shower that isn't just pastels. I had a lot of fun piping all the details on this cool little cake. Side note: This cake was also ordered by a former classmate of mine. GFS PRIDE FOREVER!
   For my final cake, I wanted to show off one of my super-favorites. I made this cake at the request of a wonderful event planner who found me through the owner of the shop next to ours. She was putting together a big celebration and really wanted the look of multiple cakes and cupcakes for her dessert table. These cakes, including the ruffles, are iced with buttercream and decorated with hand painted gold cake lace.  I made a few purple peonies to garnish the cake and I LOVE how it all came out. I really hope everyone at the party enjoyed them. Just like I hope you have enjoyed this post. If you would like to talk about designing your own wedding or birthday cake, you can contact us through our website at www.frostedfoxcakeshop.com. Also, please follow us on Instagram, Facebook, Pinterest and Twitter. I promise I am way better at keeping up with those!


Tuesday, January 19, 2016

What to Expect When You're Cake Tasting!

A sweet birch look with
gum paste flowers.
     When you are ready to design your wedding cake, call us to set up a tasting appointment. During your appointment you will sample some of our flavors and speak with the pastry chef in person to plan your cake. At the end, we will provide you with a quick sketch and a price quote for your wedding cake!

       You can start by looking through our photos and also pulling together images of cakes that you like.  In fact, you can bring images of almost anything that will help you design your cake!  That can be your invitation, color samples, lace from your dress, really anything that catches your eye.  If this sounds like more work than you'd like to do, we will have pictures and ideas that can serve as a jumping off point for you.  You don't have to bring anything with you to the tasting except some basic information about your wedding. (Where, when, how many people, just logistical stuff).

Silver metallics and tissue flowers
accent this pretty little cake.
     Once you've made your appointment and selected the flavors you would like to try you're ready to come in! We will bring out all your flavor choices in the form of cupcakes. We will also provides samples of the icings and cake fillings you would like to try, so that you can mix and match flavors and put together any combination that strikes your fancy.  Once you've had a chance to taste everything, I will work out a design with you.

    When it comes to design, I usually start by determining the size of your cake based on the number of people you would like to serve. Some couples want to go with one big cake, while others like to design several smaller cakes. Another popular trend I've been seeing lately is to combine a few smaller cakes with other desserts like cupcake, cookies, donuts, ice cream and anything else you can imagine!

   
Go big with this lovely flag cake.

Once we've figured out the size and shape of your cake, I like to hone in on the flavor selection. At our shop, you may pick a different flavor for each tier of cake, if you'd like. But ultimately, it's up to the bride and groom to pick their favorites. Next up, we select the icing which goes hand in hand with the design phase.


    Most brides and grooms will bring in a few inspiration images, which help me to get a sense of the tone and aesthetic of your wedding. We can either replicate something directly, or pick an choose elements that you like. We can even come up with something brand new based on what you've been imagining! We will work through all the details from the borders to the toppers. Color samples can be very helpful, as can invitations, photos, save the dates, etc. etc. Just bear in mind that as the cake gets more ornate, the price tends to go up. 

Weddings are all about Love!
     I usually like to draw up a little, very simple sketch which helps put all the pieces together. After we've decided on all the details, That's when I get out the old calculator and put together the price quote. There's no pressure to order on the spot, of course you may, but you should feel free to bring the quote home and go over it at your leisure. If you do decide you want to book your cake with us, we take a deposit of half and sign off on the cake contracts. 

        When we get closer to your wedding we'll check in with you to see if you have any changes you want made to your design.  Then, we start to make the decorations for your wedding cake.  First, we work on any decorations that need a lot of time to set up then we start baking, icing and decorating your cake!

Monday, August 24, 2015

You just got engaged! Now what?

Ok, this was not our wedding
day, but this is the dress I
wore! (Seen here as formal
ware for an arcade fire concert).
   Getting engaged is one of the most exciting and happy moments of any couple's relationship. Then reality sets in and you realize that now you have to plan the biggest party you've ever thrown in your life and that there are about a million details that need to be attended to and they all have a big price tag! The whole thing can get really overwhelming really quickly and for most people, they haven't planned one before, so they don't really know what to expect.

    I remember when I got married there were a lot of appointments to go to, a lot of questions I hadn't considered and while everything was exciting, it was easy to get swept up and start to feel stressed instead of excited. I met with 3 florists, 1 officiant, 8 venues (probably), 2 dj's, 2 wedding dress shops and don't even get me started on trying to figure out the wording of the invitation. The only thing I didn't do was meet with a cake shop to have a tasting! The reason there was no tasting is that I was going to make my own cake at the bakery I worked for. So, I already knew what flavors I wanted and I simply filled out the design sheet with my friend who worked there too. Most people, get to have a cake tasting and might not know what to expect. I thought I would put out a little guide about how I conduct my tastings and what you can expect from them.

Rose gold, sequins and
gumpaste roses!
  The first thing I would recommend doing, before you even start calling to make appointments, is to book your venue and possibly even your caterer. The reason I suggest doing this, is because some venues and some caterers either supply a wedding cake in their package already or they have strict guidelines about who can supply the cake. While you can usually decline the cake that's included in the package, you may just want to be sure you are allowed to bring in a cake from an outside source. Sadly, don't expect to save a lot of money by doing this, but if the cake is important to you (and why else would you be reading my blog) it can definitely be worth it. I find that you can get a better cake with more design options by going with a cake shop instead of a catering company that is usually more concerned with the meal than the wedding cake. Having attended a number of weddings in my life, I have seen some pretty mediocre wedding cakes that came from the venue (sorry to sound like a snob, but the cake is very important to me). Don't let this happen to you.
 
Let's assume her cake was probably $100
a slice.... seems like a safe assumption.
Once you've decided that you'd like to seek out cake decorators, start looking around at people's websites. They will provide you with a great sense of a given cake shops style, skills and flavors. You will also be able to find some initial pricing guidelines to give you a sense for whether or not a shop is in your budget. Be prepared, wedding cakes can range in price significantly. The least expensive option is usually a supermarket, while designer wedding cakes can go from $5 per slice to upwards of $20 per slice. This is based both on the reputation of the shop and the design of the cake. If you've been dreaming of ordering your wedding cake from the cake boss, be prepared to shell out $10-$18 a slice (or so I've been told). Want a cake by Sylvia Weinstock? Consider selling your car. Our wedding cakes typically range from $6-$10 per slice, depending on how elaborate your cake becomes. Don't be afraid to ask for pricing information when you call to make your appointment, believe me, they don't want to waste your time or theirs if they aren't in your budget. It would be a real shame to design the cake of your dreams only to find out it's going to cost you your honeymoon!

     Once you've found a few places you like, call to make tasting appointments with each shop. Some places charge for their appointments and some do not. Tastings are expensive for shops and take a decent amount of time to prepare, so try not to be too turned off by someone charging. They are just trying to make sure that their business stays viable.

      When I take an appointment, I usually ask the couple to select a few cake flavors and a few filling
ALL THE ICING!
flavors they would like to taste when they come in. This way the tasting is catered towards their interests. I also request that they bring in any photos or color samples they are working with, as these can be a great jumping off point. I also provide them with photos of my work at the tasting so that they can look through them and get inspired by them.

    On the day of the appointment, I usually bring out the cake samples and explain what each one is. I give a little information about fondant vs. buttercream and then I leave the couple to taste, look at photos and discuss in private. Once they are ready for me, I usually return with my trusty clipboard and we get some of the logistical details out of the way (who, where, when, how many?).

     Then we get to the fun part. We start to design the cake and pick the flavors! I usually get the flavors sorted out first as this is usually a little easier for the couple. Based on how many people they are inviting, we determine the size and shape of the cake, then we pick the flavors for each tier. I like to give people the option of selecting different flavors for each tier if they'd like. Once the flavors have been chosen we usually have to make the biggest decision any bride ever has to make. Should she cover the cake in fondant?! Now, if you've read my post about fondant you know some of the pros and cons. If you haven't read it, check it out here.

This was inspired by something I found
on Pinterest, but I changed it around
to make it unique to me!
    Flavors and icings have been chosen and we are ready to actually design what the cake will look like. Pinterest has become a valuable tool that came on the scene in the past couple of years I've been decorating. It used to be the case that brides would come in with binders full of magazine photos, print-outs, ribbons and whatever else they could bring, now they just come with iPad in hand. Pinterest is really great for designing, although it can be tough to edit with a Pinterest board and really hone in on what it is you like about each cake. Imagine being face with a board with about 300 cake pins and figuring out which one you like the best! Also, many of the cakes on Pinterest tend to represent very detailed (re: expensive) styles, so be prepared for that.

  Some brides choose to replicate a photo of a cake they like almost exactly. That's totally ok! It's a great way to get exactly what you want and to get something off that to-do list. Other brides like to pick and choose details from a number of different cakes which is also a great way to approach designing. That way you can get something unique to you, but you also have a firm starting point. Other brides have less concrete ideas about what they would like to do, and in this case I get to do a little detective work to figure out their style and come up with a concept they will love.

    I like to offer guidance when it comes to color, style, or small details (like the border) that a couple may not notice since they aren't cake decorators. I find that on some cake TV shows, they leave you with the impression that the couple says "we like glamour" and then the designer says something like "ok, I'll make the perfect thing, see you at the wedding" and then the cake is a surprise. I find that most people don't really work like that. I think that's a recipe for misunderstanding, as my concept of "glamour" may differ from yours. I very much prefer to get all the details out and on paper, draw up a quick sketch and ensure that we are all on the same page.

Maybe you're loving the chalkboard
cake trend!
      While designing the cake, we will decide on several different aspects of the cake. What color will
the background be? Will it have texture? What style and color will the borders be? Is there an all-over design element like brush embroidery? Are they concentrated design details like gumpaste flowers? Will there be a cake topper? Will there be fresh flowers? Will there be a monogram? Will each tier be a different design? What color scheme will we use? etc. There's lots of information on a wedding cake design form. This helps us get as close to the bride's vision as possible.

      Once we've settled all the details, that's when we get down to business. I draw up a sketch and determine the pricing of the cake. This is based on the number of people the cake will serve, the type and color of icing, the overall complexity of the design, and the delivery distance. I provide this to the  couple and we go over the details of the cake contract together. Then, if they want to book right then and there, we can take care of that in the shop. If they prefer, they can take it home, mull it over, and get back to me a little later with their decision.

     I genuinely love conducting cake tastings. It's really fun to meet new couples, especially when they are at this exciting moment in their lives. Also, the cake tasting is usually one of the more fun aspects of wedding planning that both the bride and groom enjoy, so it's great to be part of the purely fun part of the plan.

     If you're planning your wedding and are interested in coming in for a cake tasting with us, check out our website www.frostedfoxcakeshop.com for all the information you need to make an appointment.
   

Thursday, July 23, 2015

Cream Cheese, Not Just For Bagels!

   Let's continue our discussion of icings with a perennial fan favorite, that's right, we're going to talk
This doesn't even have cream cheese in it!
about CREAM CHEESE ICING! It's SO delicious! Doesn't it just sound delightful? Don't you just want to scoop it up with a spoon and eat it on a chocolate chip cookie? I do, I really really do. Now, you can buy it in a can from the supermarket, but it's just not going to be the same as the really real good stuff. I strongly recommend making it yourself, it's pretty easy to make and it will actually have cream cheese! Like everything, though, it does have its drawbacks. It's definitely more challenging to work with than buttercream icing, and it is a lot pickier when it comes to what temperatures it likes.
Red Velvet with Cream Cheese Icing!
    
   Cream Cheese Icing is a delicious alternative to buttercream. Some people can find buttercream to be a little too, well, buttery (not me, but some people do). Cream cheese icing has a pleasantly grainy quality to it (sounds weird, I know) and it develops a nice kind of crust that some people like on their icings. It's also sweeter than our buttercream, so for people who really love their desserts sweet, cream cheese icing is a great option. 

 
  Do you love red velvet cake? You actually love cream cheese icing. Do you love carrot cake? You probably ALSO secretly love cream cheese icing. There are quite a few cakes that are almost always iced with cream cheese icing because it really complements the cake. While buttercream is great, I can't really think of that many cakes that must be made with buttercream icing to be right. It has a real nostalgia quality that just can't be matched.

You can color your cream cheese icing
like I did on these pumpkin cupcakes.
    If you've never had cream cheese icing, it is a lot like the american style buttercream we talked about in an earlier post. It's pretty simple to make. For ours we beat together a pound of room temperature cream cheese with 12 oz of room temperature butter. Then we add in 28.8 oz of sifted confectioner's sugar. Once it's all in, we add 1/3 fl. oz of vanilla (2 teaspoons) and let the kitchenaid beat the crap out of it until it is stiff and white. So, making it is pretty darn easy. However, any cake decorator can tell you that sometimes it just doesn't want to cooperate when you start to ice your cake.

These Carrot cupcakes want to warn you:
Beware the dark side of cream cheese icing!
    The dark side of cream cheese icing is that you have to get the consistency just right when icing the cake, or it can be really frustrating. It has a tendency to be gooey, sticky, soft and stiff (in a bad way) all at the same time. So what can happen is that your beautiful sharp corners that you worked so hard to achieve at the top of your cake will start to droop and sag, making them a rounded mess. You're sides start to slope so that your icing is thicker at the base than the top! You're icing can be sticky and stiff in a way that simply pulls crumbs off the cake and into the icing. Worst of all, if you room is too warm, it can be a real struggle to stop the icing from basically melting all over your cake! But fear not, it just takes some practice and some know-how to get it to be your friend. I've worked with it for about 8 years now and can get it to be as pretty as my buttercream cakes.

    Here are my tips for icing a cake with cream cheese icing if you want to make your life a little easier and your cake a little nicer:
   DO work with it cold, the colder it is, the stiffer it will be. 
   DON'T try to work with it in a hot kitchen or when the icing is warm. The warmer it is, the meltier, gooier and messier it will be. This makes it really hard to get clean edges and corners.
   DO make sure the cake you are icing is nice and chilled, frozen is ideal. 
   DON'T get inpatient and try to ice your cake while it is still warm. You're just asking for crumbs, broken layers and heartache.
   DO beat the crap out of your icing with a kitchenaid. Beat it until it is quite white and stiff. This could take 5-10 minutes. It will start to get more matte looking, as well. 
   DON'T try to ice it with cream cheese icing that is yellowish, grainy, wet-looking, or sticky. Put that stuff on the mixer and let it go until it's white and stiff!
   DO plan to do a crumb coat, then freeze it solid before you apply your finish coat. This will give you the prettiest looking cake and keep crumbs out of the way. It will make your life much easier.
   DON'T try to use this icing if you cake is going to sit out in the sun or heat. It's just not going to stay nice, it will sag, droop and melt. Keep it in the AC, please. 
   DON'T try to ice a tiered cake with cream cheese icing. I mean, you can try, but I wouldn't recommend it (at least not the real stuff, I can't account for people who use cream cheese icing full or stabilizers, maybe theirs works on a 6 tiered wedding cake). The reason I don't use it is that it's just a softer icing that never really sets up with the same strength as buttercream or fondant. Your cake could start to smoosh under it's own weight. Cream cheese icing is much better suited to single tiers and cupcakes. 
   DO use cream cheese icing on your smaller cakes. It's just delicious and it works with so many different flavor combinations. It is a sweet icing, but it also has that great savory element from the cream cheese. I also highly recommend adding a little cinnamon and putting it on pumpkin pound cake!
   DON'T plan to use this for your piped decorations. Try buttercream instead, it will set up much better and be a more reliable piping consistency. 
   DON'T try to cover a cream cheese cake with fondant. Your edges won't look nice, use buttercream instead. 
   DO re-whip your cream cheese icing periodically, especially if you've had it in the fridge for more than an hour or two. 

DO add cinnamon and make
pumpkin cupcakes with Cinnamon
Cream Cheese icing!
     Those are some of the DO's and DON'Ts that I've learned over the years. Remember that every recipe is different, so feel free to experiment. You may have some tricks of your own for taming the beast. If it's still proving difficult, take heart, it can happen to all of us. For example, two weeks ago I drove some red velvet cake layers and a batch of cream cheese icing up to New Hampshire for my Nai Nai's 90th birthday. My first mistake was trying to work in a different kitchen, this is always a bad decision. Next, I really wanted to make this a strawberry short cake variation, so my filling was very loose, probably not the best plan for a cake getting cream cheese icing. I wasn't too worried though, until I put my mom's hand mixer into the icing and PROMPTLY KILLED THE MOTOR! This meant I wasn't going to be able to beat the icing to the proper consistency discussed above. This made icing the cake much much more challenging. After about 30 minutes in icing hell, and 2 crumb coats and some time in the freezer, I finally managed to get that icing to behave and was able to make a pretty looking cake for my Nai Nai. The moral of the story? Don't give up. When it doubt, let the cake chill and don't lose hope! The cake looked beautiful and tasted delicious, and in the end, that's what matters.
It all worked out in the end with this
red velvet/strawberry shortcake with cream cheese icing.

Monday, July 20, 2015

In Defense of Fondant

A fondant covered cake, complete with fondant ruffles.

      In my last post I wrote a lot about buttercream icing. Today I wanted to talk about another type of icing all together: FONDANT! I love working with fondant and many of my cakes are covered in fondant (you can see pictures here). Sadly, fondant has gotten a bad reputation as of late.  It seems that lots of people love the look, but have this idea that it tastes terrible. I can't tell you how many people I've spoken to who say "I hate fondant! We DEFINITELY don't want fondant on our cake!" Well, today I'm going to make a controversial argument. A fondant cake can look great and taste great!

The center of this egg is also
fondant!
    You might be wondering "what exactly
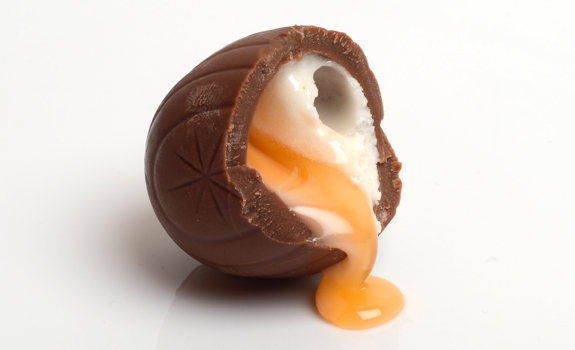
 is fondant?" Fondant is a sugar based dough that can be kneaded, rolled thin, and smoothed over a cake. If you've ever seen a wedding cake with a super smooth look, it was probably covered with fondant. There are also different types of fondant. There is fondant that is stiff and intended to be rolled out and layered onto a cake and there is also fondant that is used in a more liquid form to create a glaze or a filling for a confection (picture the filling in a cadbury cream egg).
 
This is my favorite brand of fondant.
    You can try to make fondant yourself, it's basically just a ton of confectioners sugar, but it's sort of a nightmare to make and will probably either kill your mixer or your wrists. I prefer to buy mine (it's one of the few elements that we work with that we don't make ourselves. There are many different brands of fondant and some brands are better than others to work with or to eat. I find that the "Massa Ticino" fondant by Carma is both easy to use and tastes quite good! It's sweet without much additional flavor or an aftertaste, sort of like a marshmallow. It also holds up pretty well against high-humidity environment which can cause fondant to get slimy or melt if it absorbs too much moisture. It's definitely not the most affordable brand, but it's the one that I enjoy using and it has successfully converted many of the fondant-phobic into fondant-lovers (or at least they don't hate it anymore!)

Properly applied fondant is smooth
and has an even color tone.
      There are many reasons why it's a great idea to consider using fondant on your cake. It has a super smooth look that you just can't duplicate with buttercream. If you want a pure white cake, fondant is much whiter than buttercream (which is off-white). It is more resilient in the heat and can prevent your cake from melting or showing signs of melting. It provides more structure to a cake, particularly if you are going to be making a very large cake like a big wedding cake. It holds color better than buttercream icing, which means your black and orange halloween cake is less likely to stain the mouths of your guests. There are certain techniques and looks that are difficult or impossible to replicate in a different type of icing. Last but not least, some people even love the taste of a fondant!
   
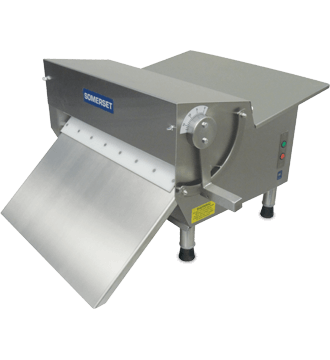
A fondant sheeter rolls the fondant
out to the perfect thickness.
     Have I convinced you to give fondant a chance yet? Let me tell you how we use it, maybe that
will allay some of your fears.  We strongly recommend using fondant on any cakes larger than 2 tiers, especially if they are destined for a warm environment (which is anything above room temperature). We do this so that your cake will be safe and sound until it is served. Don't worry though, whenever we use fondant on a cake we always make sure that it sits on top of a nice, thick layer of vanilla buttercream icing. So you get the great flavor of the buttercream and the structure of the fondant. We also make sure to roll our fondant very thin with a sheeter (picture a giant pasta machine) so it doesn't affect the overall taste or texture of the cake very much.

Sean, my husband, is putting a crumb
coat on this cake.
    When I cover a cake with fondant I always start by giving the cake a nice, thick layer of buttercream icing. This is called the "crumb coat" and it seals all the crumbs into the cake and gives it super straight and smooth base. If you didn't crumb coat your cake with buttercream first, your fondant will probably look very lumpy and you may be able to see dark patches where your cake shows though. This is never a good look! Once you've crumbed your cake, put it it the fridge to let it set up like cold butter. This will help maintain your nice straight corners and sides. I usually begin to knead my fondant in confectioners sugar until I have a nice smooth ball. I squash it flat and begin to roll it out, either by hand or with the sheeter, until it is about 1/8" thick and wide enough to cover my cake completely. I use confectioner's sugar to prevent the fondant from sticking and I never flip it over to make sure the outer surface will be perfectly smooth and clean.
Not only is this cake covered
in a layer of fondant, but all
of the decorations are fondant
as well.
   
      This next part takes a little practice. I pick my fondant up and place it over my cake. I usually try to smooth the top down very quickly and then I smooth the fondant over the top 1" of the sides of the cake. It will look like a tablecloth, but if you carefully stretch the fondant while smoothing it against the sides of the cake you can work all the folds out until it is totally smooth without any rips, tears, divots or folds. Like I said, this takes some practice. I find that the taller a tier is, the more challenging it can be to smooth the sides without any marks. I also think it is easier to smooth a round cake than a square cake since it is more challenging to navigate the corners. If you have marks or aren't happy with the layer, you can carefully remove it, re-crumb your cake and try again. Another great hint is to use your decorating elements to hide any flaws you have. This can only do so much, though.

This close up of the house in
process shows how you can
texture fondant.
     Once the cake is successfully covered with fondant you can do all kinds of fun things to decorate it. You can pipe onto the cake with royal icing or buttercream. You an add texture to your cake with quilting, ruffles, crimpers, or an impression mat. You can paint directly onto your cake with an airbrush or by hand with buttercream or food coloring. You can roll out more fondant and cut out shapes, then stick them to your cake. You can also use fondant to make the decorations that will go onto you cake like figures, logos, molded items or even some flowers. It's a great way to make your decorations enjoyable to eat, as opposed to using gumpaste which is edible, but you really don't want to eat it.
 
    I hope I've convinced you that fondant can be a great addition to your cake. I really love working with it. Remember, if you still don't like it, you can just peel it off your slice of cake and stick to the buttercream!

Thursday, July 16, 2015

The Beautiful World of Buttercreams!

These are some of our flavored buttercream icings!
   Let's talk about icing! There are many different types of icings in the world and each has it's own
different taste and application. There are a wide range of different textures and tastes and everyone has their favorite. Depending on where you live, you may be more familiar with one style over another. In fact, if you compare decorating cultures (for example, comparing the US to Great Britain) there can be extremely different approaches to how one should ice a cake and with what type of icing! There are buttercreams, fondant, cream cheese icing, gumpaste, royal icing, pastillage, marzipan, ganache, glazes, and modeling chocolate that can all be used to cover or decorate a cake! (To see some cakes that I've made and decorated with a variety of icings, check our www.frostedfoxcakeshop.com). Today, I'm going to focus on buttercreams and then I'll go over some of the other varieties in future posts.
 
A pre-made buttercream.
Not my favorite style of icing!
    I believe that when most people think about buttercream, they are usually thinking of that super sweet icing that you might find on a supermarket cake. Now, that icing has its place and its fans, but in my opinion, it's just not buttercream. I find it to be too sweet and frequently gritty (it's basically sugar, shortening and a bunch of preservatives and stabilizers). REAL buttercream is made with butter (duh). It should be sweet, but not tooth-achy sweet, smooth, creamy and light. It's best eaten at room temperature so that the icing has a chance to soften, otherwise it can be too much like eating a cold stick of butter. This is an extremely popular type of icing, but did you know there are many different styles of buttercream?
The real stuff!
 
    That's right, there are many varieties, among them "American Buttercream," "Italian Meringue," "Swiss Meringue," "French Meringue" and "French." "French Buttercream" is very rich as it is made with butter, sugar and egg yolks. "Italian Meringue Buttercream," French Meringue Buttercream" and "Swiss Meringue Buttercream" are made with a meringue base (egg whites) into which sugar and butter are added (they are named after the type of meringue used in the icing). Of course, you can leave it to us Americans to come up with the simplest style of buttercream, in our version, usually the butter is creamed with confectioner's sugar and then sometimes milk is added to make it smoother.
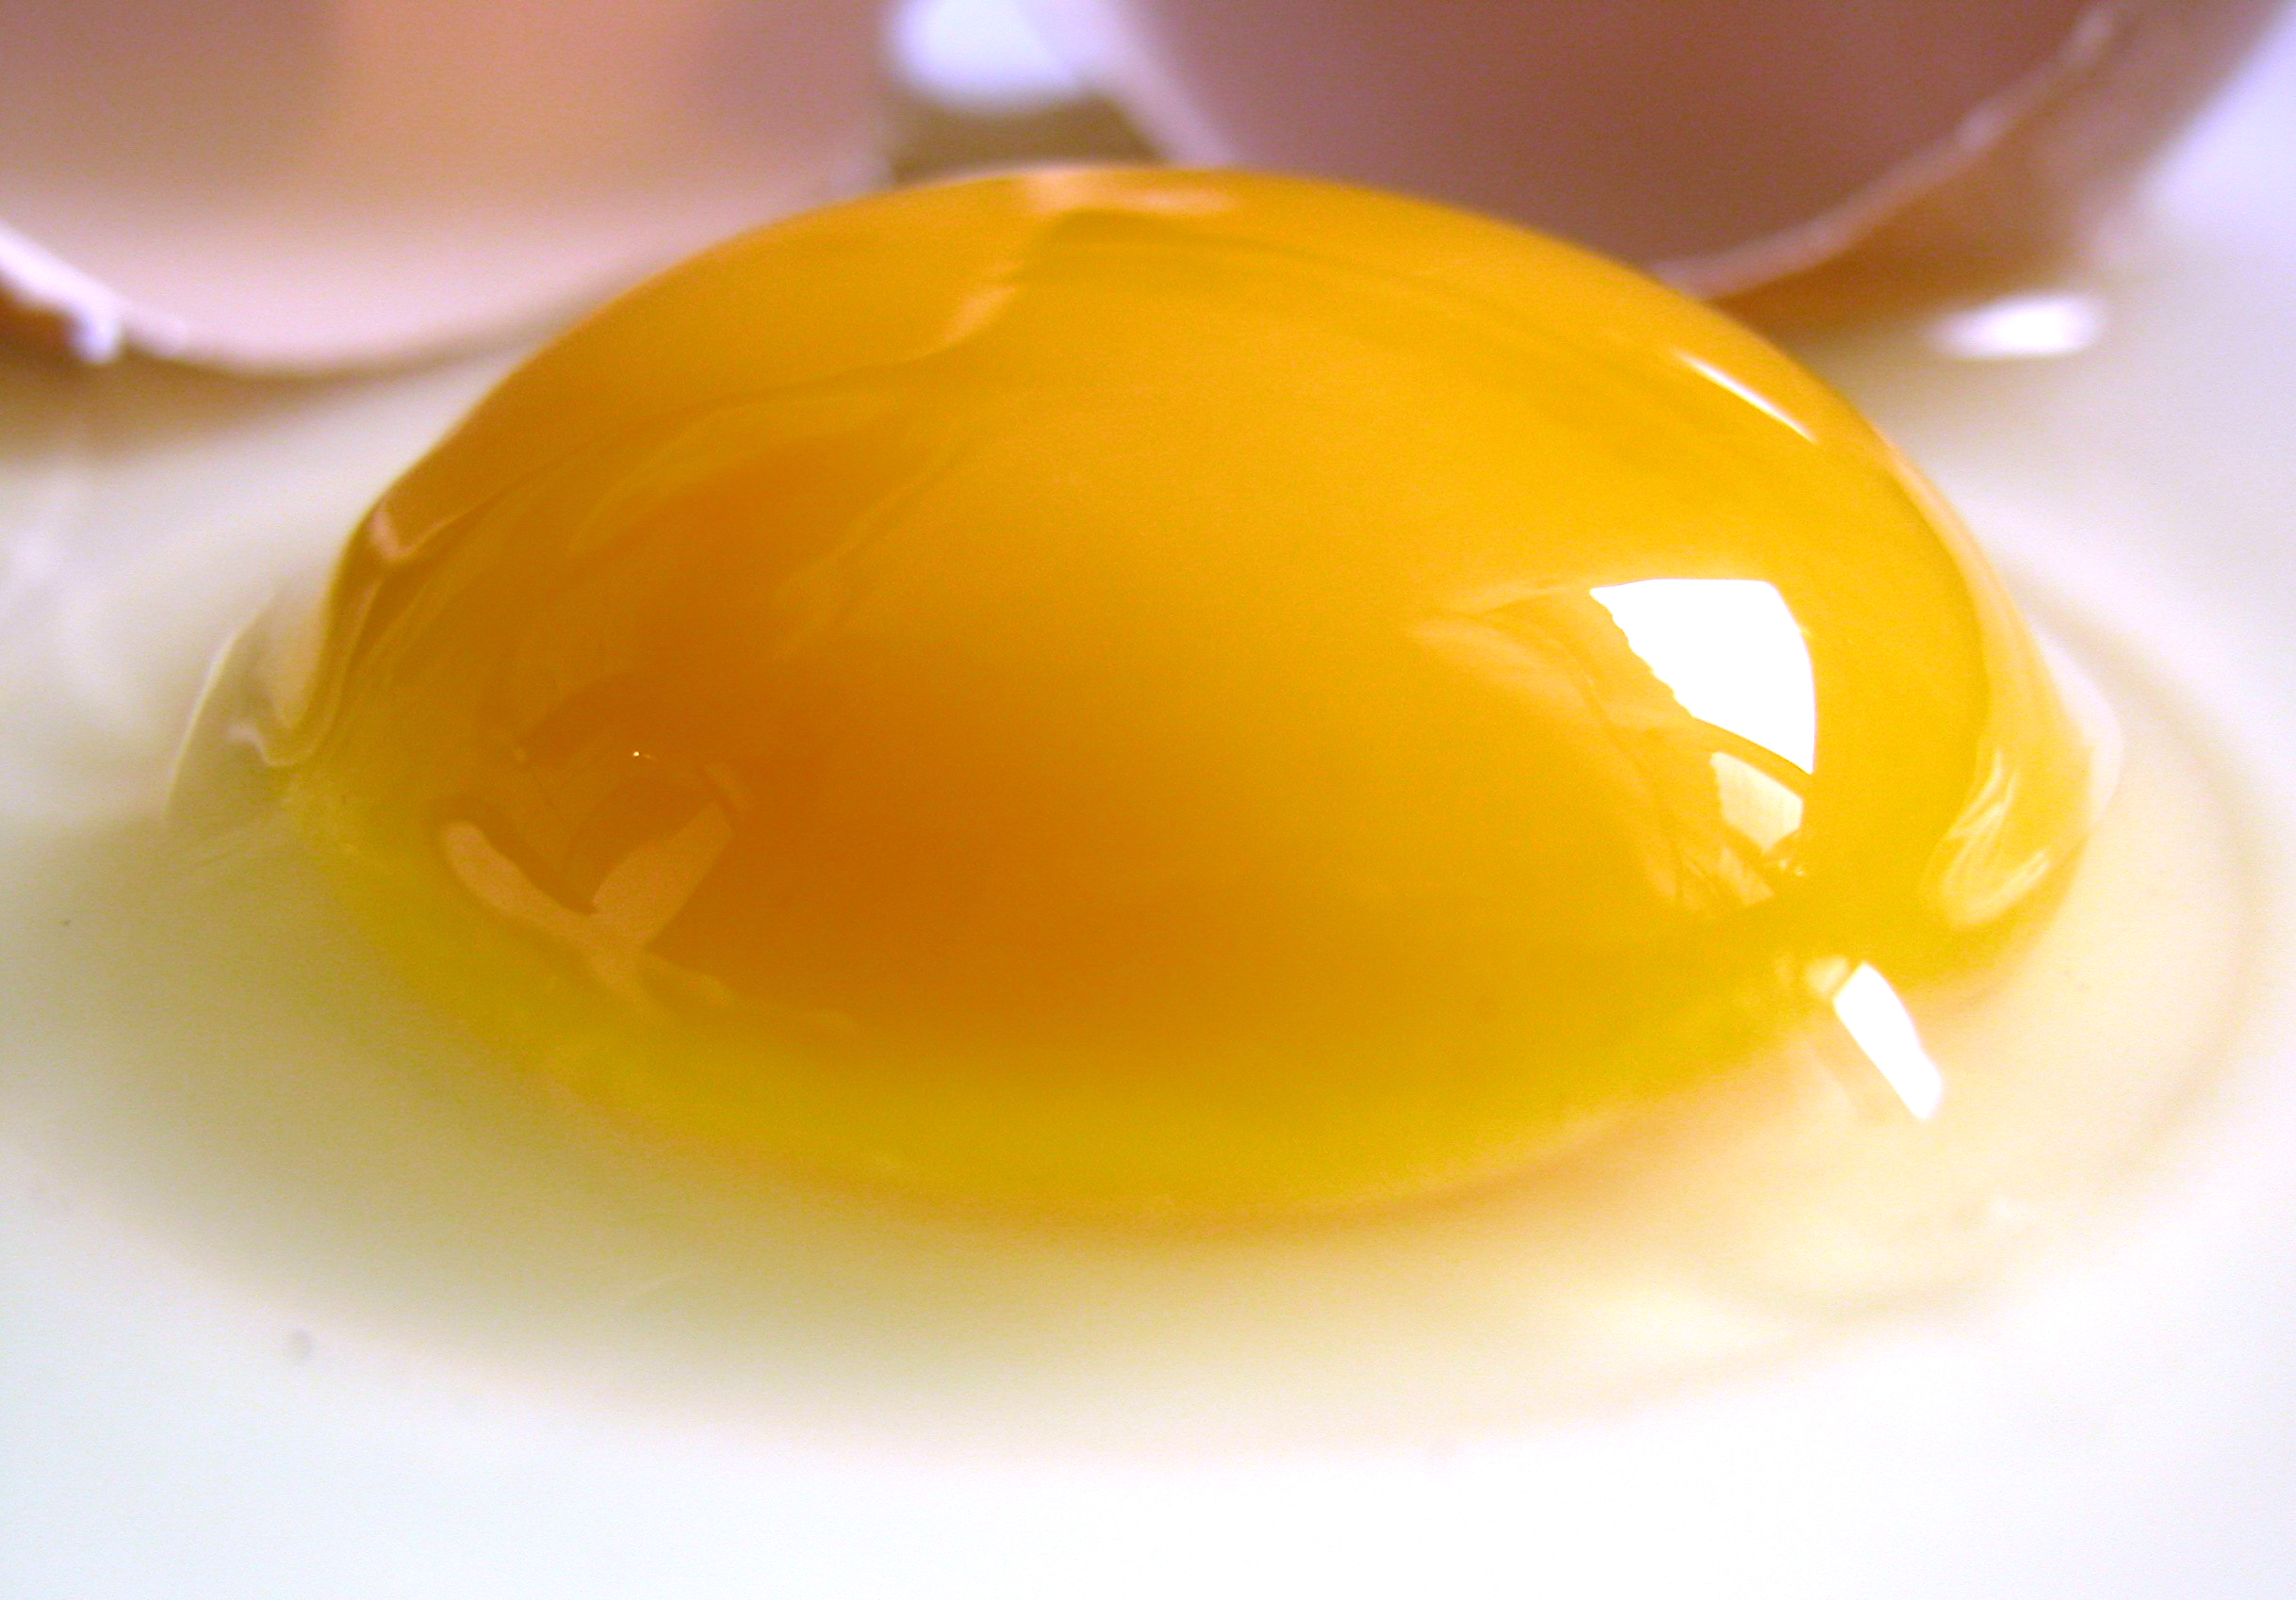
Yolks form the basis of French
Buttercream.
 
   Why would you need so many different styles of buttercream? Well, each one has different pros and cons. French buttercream is very rich, it's delicious but it can be too rich for a strongly flavored cake. It also has a tendency to be more yellow than other buttercreams thanks to the presence of the egg yolks in the pate a bombe base. It also has a tendency to be more susceptible to heat. It works best as a filling for cakes or other pastries that use buttercream. Another drawback to french buttercream is that it can be more difficult to make than other versions since it requires making a pate a bombe. It is also possible that the egg yolks will not reach a "food safe" temperature so it could be potentially risky in the same way that eating eggs over easy can be a little risky for certain populations. Given all the cons, I don't really make this buttercream, it's just not quite what I look for in an icing.
Our chocolate icing is
an American Style
Buttercream.
 
    If we swing the difficulty pendulum in the opposite direction we come to "American Buttercream." This is what many of our elders might have made for our birthday parties. You simply beat butter until it is creamy, add a whole lot of confectioner's sugar, a little vanilla, a little milk, then beat the crap out of it until it is smooth and silky. This buttercream is quite tasty, although it is definitely quite sweet. Not as sweet as the store bought stuff, but still pretty sweet. It is pretty easy to work with, but is also quite susceptible to heat. The chocolate icing we make is a variety on this style of buttercream (we add cocoa) but when it comes to our vanilla buttercream I like to make a meringue based version.
With Swiss Buttercream you heat
the egg whites and sugar together
over a water bath.
   
    There are three meringue based buttercreams. "French," "Italian," and "Swiss;" each are named after the style of meringue used to make the buttercream base. In all three versions, a meringue is made, and then room temperature butter is added in and whipped until it is silky smooth. You start with this airy meringue, then start to add your butter, and eventually you have this "oh crap!" moment when it breaks and it looks like it will never work, but then it magically starts to come back together and form a beautiful, smooth emulsion! In the "French" style, the you simply add dry sugar into you egg whites as they whip. The two big drawbacks of this style are that it isn't as stable as the other two AND since the whites are not cooked, it's not really up to US food safety standards.
 
In an Italian Buttercream the 240 F
sugar syrup is poured into the
egg whites to make a stable meringue.
 "Swiss Buttercream" is made by heating the egg whites and sugar together over a water bath until they reach a food safe temperature, then you whip the whole thing until it's voluminous and cool to the touch. This is the most food safe version of buttercream, but can take a little longer to make and is slightly less stable in heat than it's cousin, "Italian Buttercream." "Italian Buttercream" is the most stable buttercream because it is made from the most stable meringue. In this version, the sugar is cooked with water to the 240 F, then you pour the hot syrup into the whites as they whip and it forms a very strong meringue. This is the trickiest method to make, but I think it is worth it as the icing is great for decorating and it is food safe, delicious, sweet, and has a great mouth feel. This is my preferred icing and it is how I usually make my buttercream.
   
   All of these buttercreams can be flavored in a wide variety of ways. You can use jams, extracts, liquors, custards, pastes, chocolate and pretty much anything else as long as it can be blended into a high-fat emulsion. I do want to note, however, that when you add flavors, it can change the texture of your icing causing it to break or loosen if you add too much. You can adjust the consistency by adding more confectioner's sugar of liquid, but it's a delicate balance. You can see the full list of our flavors on our website www.frostedfoxcakeshop.com for some ideas.
 
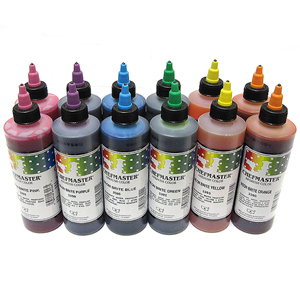
Food colors can be added to make
the buttercream any shade you want!
 Real buttercream is naturally off-white or ivory thanks to the butter, but it's a really beautiful natural, soft shade.You can also color your buttercreams almost any shade in the rainbow! I find that gel colors work the best for buttercream as watery food colors don't really mix into the emulsion very well and give a spotted affect. Also, it's worth mentioning that if you are going to deep, intense colors, they can often come off on your guests lips as they eat, so fair warning if you are looking for an all-black wedding cake, you may be in for a surprise when you see your wedding photos!
   
   All true buttercreams have one major enemy, heat. They all have the potential to melt if they are being held in a hot environment like, say, an outdoor summer wedding. However, some of them are a little more stable than others in heat. They can also be tricky to work with in a hot kitchen where than can be loose and kind of frustrating. This is why many people use shortening as a base, it's more heat stable, but I just don't think it tastes as good as butter or has as nice a mouth feel as real butter. Another potential drawback for buttercream is that it can be a challenge to create a perfectly smooth, blemish-free surface. Also, there are some techniques that just can't be done with buttercream.  While I believe that buttercream is one of the best tasting icing options,  it does have its limits.  That's why it's important to consider using the other icing options in conjunction with the buttercream. Next time, we're going to talk about that controversial F-word: FONDANT!

Monday, July 13, 2015

So You Need to Order a Specialty Cake....

This is one of favorite
new designs for our
foxy bakery!
      I thought I would talk about little bit about the process of designing and creating a cake for a special occasion. There are many factors to consider when it comes to the final product but here I'll break down some of the main ones that you and your cake decorator should consider when meeting. Now, this may vary from decorator to decorator and I can only speak to my own experience and process when designing a cake. This should still work as a general guideline for planning your party cake.
 

Examples of cake serving size suggestions.
   One of the first things to consider when planning your cake are some of the basic logistics of your event. I'll need to know when your party is, how many people you want to serve with the cake and if there are any dietary concerns. You also may want to start thinking about what flavors you want to select for each tier. These basic logistics will help me guide you towards an appropriately sized cake for your event and it will also help me to recommend the right exterior icing. Sometimes fondant can be a great choice if it will be a hot day or if the size and shape of the cake will need some extra support. I also want to make sure you have realistic expectations regarding the size of your cake. While we're at it, I will usually be able to give you a price estimate so that you know what to expect before we sort out all of the details.
Some of my design doodles for some
display cakes.
   
   Now that the logistics are out of the way, we can get to the fun part, the design! I usually recommend that my clients take a look through our photo albums and our website to start getting ideas. From there, you can delve deeper into the world of online searching via google or pinterest or any other search engine you enjoy. One caveat, sometimes there can be almost too much out there and it can be hard to make decisions. Try to narrow it down to a few designs, and remember, you can always change things or pick and choose design elements from different cakes!
I made this cake for an "Up"
themed baby shower for a
friend of mine.
   
    When you come in, usually I'll look through your pictures with you and we will start to build your cake design. We'll hone in on design elements that you want, like borders, colors, piping, fondant details and overall look.  A different approach is to bring in any decorations you are using for your party. Invitations, plates and napkins can be a wonderful jumping off point for a design. They can give me ideas about color, motifs and characters. I'll make some recommendations if I foresee any concerns, but it really is a joint process.  My goal is to exceed your expectations and make sure that the design will flow beautifully and also fit into your overall event scheme.
 
I made this gumpaste Peony several days before bringing
it all the way to Cuba for my brother-in-law's wedding.
     Once the order is placed, I generally start making any decorations that will need to sit and set up. I'll start a few days before the cake is going to be picked up making things like fondant bows, gumpaste flowers, sugar veil lacework or anything else that will get sculpted and will need to set for several days before being added to the cake.  Then the cake will be baked, crumb-coated, iced and most of the decorations will be added. Sometimes, I will hold off on adding the final details until just before the cake goes out if there is the possibility that the decorations will be adversely affected by being in a humid refrigerator.
     Any given cake usually has several hours of work put into it. From the time spent designing the cake with the customer, to the hours put into baking it, not to mention the time spent actually making and applying the decorations. Each cake is a labor of love and we work really hard to make sure that our customers will love their cake.
   

Thursday, June 25, 2015

From Scratch Attack!

     So, last time I talked about the not-so glamorous world of permits and licenses. This time, I wanted to talk about something more fun! The wonderful thing about opening your own cake shop is that you get to decide what you're going to bake, how you're going to bake it and what it's going to look like. So let's talk about that! Starting with the "how."

Delicious, from-scratch cookie dough... my Achilles heel!
     For me, one of the most important things about opening my bakery is that I want everything to be made from scratch by a real person. Seems pretty obvious, right? Real butter, real sugar, real flour, real lemons and real apples means really good pastry. But it's not that simple.  Have you ever noticed how most supermarket icing tastes the same no matter where you go? Or that the "Fresh-baked" chocolate chip cookie you are eating has a slightly funny, chemical taste to it? Well, sadly it's because so many places use mixes, batters and icings that are full of preservatives.  I mean, I get it, it's cheaper, easier and requires less skill, but they are deceiving customers into believing that their baked goods are homemade.  Even though they advertise items as "fresh baked" at the store, there is a high probability that what they are baking was made at a factory months ago with a long list of chemicals as its ingredients.
   We know it's tough out there for a small, family owned business. The food industry is already notoriously unreliable and the profit margin is razor thin. Bakeries are getting crowded out by supermarkets every day. So, why am I crazy enough to open a bakery?
This is my life motto.
   It's because I am betting that there are enough people in our wonderful city that value real food by real people to keep our doors open. For my husband and me, making our sweets from scratch is non-negotiable. Now, this may mean that our prices can't be the lowest (have you seen the cost of eggs lately?) but we know that they correlate to a higher quality sweet than if we went the cheaper route. Plus, if you're going to treat yourself, shouldn't you make sure that treat is great?
   Now, to prove we are not total Luddites, we do use mixers and fondant rollers, but that's about as high-tech as we get for equipment.  While I have great respect for people out there whipping their meringue by hand, I just don't have the Popeye arms to make that happen! Also, I know that rolling out pie dough and sheets of fondant by hand is a great upper body work out, I'm simply too short to get any good leverage over those doughs! I hope you'll forgive us for those little shortcuts, but if you've ever owned a stand mixer or a Cuisinart, you know what a time-saver they can be! Have you seen that video of automated cake decorating robots? It's kinda neat, but frankly, they just don't look that good. Wouldn't you rather have your cake made by a real person than some giant robot arm without an eye for detail (or any eyes at all)? Here it is for you to see, yes it's neat, no I wouldn't want it icing my birthday cake.
    So we have figured out how we're going to bake (the old fashioned way with the added help of some basic equipment) but what are we going to bake? I'll cover that on my next blog post.

Tuesday, June 23, 2015

"Adventures in Permitting" or "When Will You be Open?"

Me when people ask me when we will be open....
So, this is the big question. Everyday I have friends, family, neighbors and strangers asking me "How's the bakery coming?" and "When will it be open?" Sadly, I still don't have a concrete answer. I really truly wish I did.  If you've ever seen the movie The money pit then you'll recognize the refrain "two weeks." That's how I feel right now (only for me its 2 months). It sounds naive to say that this project is taking me longer than I expected, but it is. It turns out that when you decide to open your own business (and particularly when you want to make sure all the proper paper work/permits/licenses are accounted for) it takes a long time!

  We've encountered a few things that have slowed us down, I'm sure there will be more, but this is what's happened so far.  The first thing we needed to do was to gain a zoning variance. Now, in Philadelphia, what this means is that our shop wasn't originally zoned for food production, just for general retail. We needed to get a variance that would allow us to set up what is technically something of a take out restaurant to allow for food production and sales. In order to get that variance, the most important step is getting support from the community, then you take that letter of support to a zoning hearing and you plead your case.
   Sounds pretty easy, right? Not quite, you can get turned down for the variance if the neighborhood doesn't support you or if you aren't prepared to plead your case.  I had it from some good sources that we would probably get the variance, but it wasn't a guarantee. Still, we loved the little store front we found so much that we were willing to take a gamble on getting the variance. You also need a lawyer to represent you and you need to file a bunch of stuff in order to get a rejection from the zoning board before you can appeal and try to get your variance. Unfortunately, all of this takes time and all of that time is measured in the dreaded "business days" as in, "we will get back to in 30 business days." So, this was several months of anxiously awaiting what the community and the zoning board would say.
  The great news is that it all went really well! We gained community support and were successfully granted our zoning variance. Thankfully we have a great design team that put together a beautiful set of plans and a great lawyer who was super thorough and organized! As of early April, we had officially completed the first step of opening our shop. The next step was getting health department plan approved by the city's health department.
I always picture the health inspector from Ratatouille!
  More paperwork. For this part, we supplied the health department with all of our plans for our buildout. This included every last detail down to the type of paint we intend to us. We also supplied them with the spec. sheets for our equipment, our menu list, our ingredients and recipes and our sanitation plan. Luckily, Sean is an expert on sanitation and we both recently brushed up on our food safety certification with straight A's! Now, it may sound like I am complaining about this process, but it's really important, the last thing you want to do is start construction only to find out that your plans aren't up to the health code and you need to re-arrange all your plumbing or something like that! It's much better to be able to make changes on paper than to have to rip-out equipment and start over! Also, great news, we were approved without having to make any major changes! Thanks City of Philadelphia Department of Health!
  Once that step was complete, we could move on to the next stage of paperwork and permits. This is where we are now. We have our awesome contractor selected and he's working hard to get all the building/plumbing/electrical permits in to the city so that we can make sure all our construction is safe and sound! Hopefully, those will arrive in the next few days and we can start working on the space itself! When that day comes, I will probably run around my house screaming with joy and then eat about 10 celebratory chocolate chip cookies!
Me celebrating work starting on the space!
  From there, it will hopefully just be a few short weeks before work is done, equipment is in, the place is sparkling clean and we can do our final health inspection with the city.  As important as all the proper permitting and licensing is, I really just want to get into my kitchen and bake! In the mean time, we are testing recipes at home, making cakes for friends and family, and working on the back-office type stuff. Employee handbooks, uniforms, photo albums, websites and anything else a business owner has to do in order to allow them operate a successful business.
  So, if you're thinking of opening a bakery business, be prepared for a lot to time and energy spent outside of the kitchen before you can even get into your kitchen! Also, never give anyone an estimate of when you will be open, because you may have to eat your words over again.