Showing posts with label specialty cakes. Show all posts

Tuesday, August 18, 2015

Cake of the Week: WALL-E addition

Let's do another cake of the week! I know what you're thinking.... I haven't done one of these for a while, and I only ever did one to begin with! Well, you're right. But let's try to get things back on track. I think in the future I will try to feature a new "Cake of the Week" each monday. In general, the cakes will be pulled from the previous week's work, that is unless we get backed up or I want to feature more than one cake from a given week. Today, let's talk about a cute little sculpted cake I made for a friend of mine at the beginning of the month.
    This friend worked with me at my previous job with John and Kira's chocolates and she's been excited to order her son's birthday cake since about January (his birthday wasn't until August!). Back in January when I was young and naive, I assured her that there was no way we wouldn't be in our shop by then, and of course I would do her cake!! Little did I know I would still be working out of my home kitchen, good thing she's a very understanding friend! (Surely, we will be in our shop soon, I promise!)
    So anyway, her little boy loves WALL-E. Like, LOOOOOOVES WALL-E. Which is great because it's a great movie and even though I sobbed through the whole thing I think it's so cool for a little kid to get into it. She asked that I make a small sculpted "WALL-E" for his birthday cake. She suggested that we make him when he is folded up into his box form to simplify his construction. I started with this photo as my base for the design:
This photo served as the basis for my cake.

    We thought that this would work out well so we selected the flavors  (marble cake with chocolate icing as the filling) and I set to work on stacking and sculpting the general shape. I noticed he isn't quite a cube, so I tried to build out the bottom half a little and build up his eyes. This is how he looked before his crumb coat of icing:
    He kind of looks like he's going to be a washing machine... doesn't he? The next step was to cover this body with a layer of buttercream icing. This serves a couple of purposes. It seals all the crumbs and pieces into the cake, it creates a nice, crisp edge and a smooth surface on which to apply the fondant and it provides the delicious flavor of the buttercream before you add the fondant layer. Unfortunately, I didn't take a photo of the crumb coat, but imagine the photos above, except all white and smooth without any more visible cake crumbs.
    Next, I covered his entire body in WALL-E shaded yellow. This formed the base coat to which I started to apply flat cut out pieces in grays, black and more yellow to create the different components to this little robot. At this point, I made little gumpaste eyebrow pieces and let them set up so that I could add them to the finished piece. Once all the fondant was applied this is when you can start to tell he was going to be WALL-E.


   So, now you can see that he is started to look a little bit like WALL-E. Now the fun part begins. I LOVE painting sculpted on cakes because that's when they go from looking a bit like the subject to looking a LOT like the subject. WALL-E is dented, rusted and dirty and metallic. So, I mixed up some browns, reds, grays, blacks, yellows and whites and start building up layers of high-lights, rust and low-lights. I found that by painting on the food-coloring, then wiping a clean towel through it, I could achieve a cool, rusted look. After all his painting, he finally looked like himself.
    One of the thing I've decided to try to challenge myself with as a decorator is to try to add a little extra detail to make the cake extra special. I've usually had to work under such intense deadlines that it wasn't always possible to take a step back and add that extra element that takes a cake from being "good" to being "great." Now that I am opening my own shop, I really want to push myself to do this as a rule, to try not to settle for just "good." So, with that in mind, I realized that WALL-E needed to be with his best friend, a little cockroach names Hal. I started by finding a photo of him and then I built him out of gumpaste. I made his little body and teeny legs and antenna then allowed them to dry. Next I attached a pair of shiny wings and then I attached his legs and antenna to his body and let the whole thing set up on a toothpick. Once he was completely dry, I attached him to WALL-E so that they could be together. This is what Hal looked like on his own:

   The last thing I had to do was to address the cake drum WALL-E is sitting on. I decided to use cake crumbs to create a dirt look, since WALL-E is a trash collecting robot on a desolate Earth. Then, for the birthday message, I made a couple of leaves (just like the one WALL-E finds at the beginning of the film) and wrote "Happy Birthday" on them. I was really happy with how WALL-E came out. I can't wait to do another sculpted cake. Here he is in all his finished glory!


   So there you have  it! If you'd like to see more of our photos or if you  are interested in ordering a cake, please check out our website www.frostedfoxcakeshop.com for the how-to and photos. Also, please "like" us on Facebook at www.facebook.com/frostedfoxcakeshop  or on Instagram for more current posts about our shop, our staff and our projects! Thanks for reading!!


Thursday, August 13, 2015

Cover Your Cakes in Sugarveil!

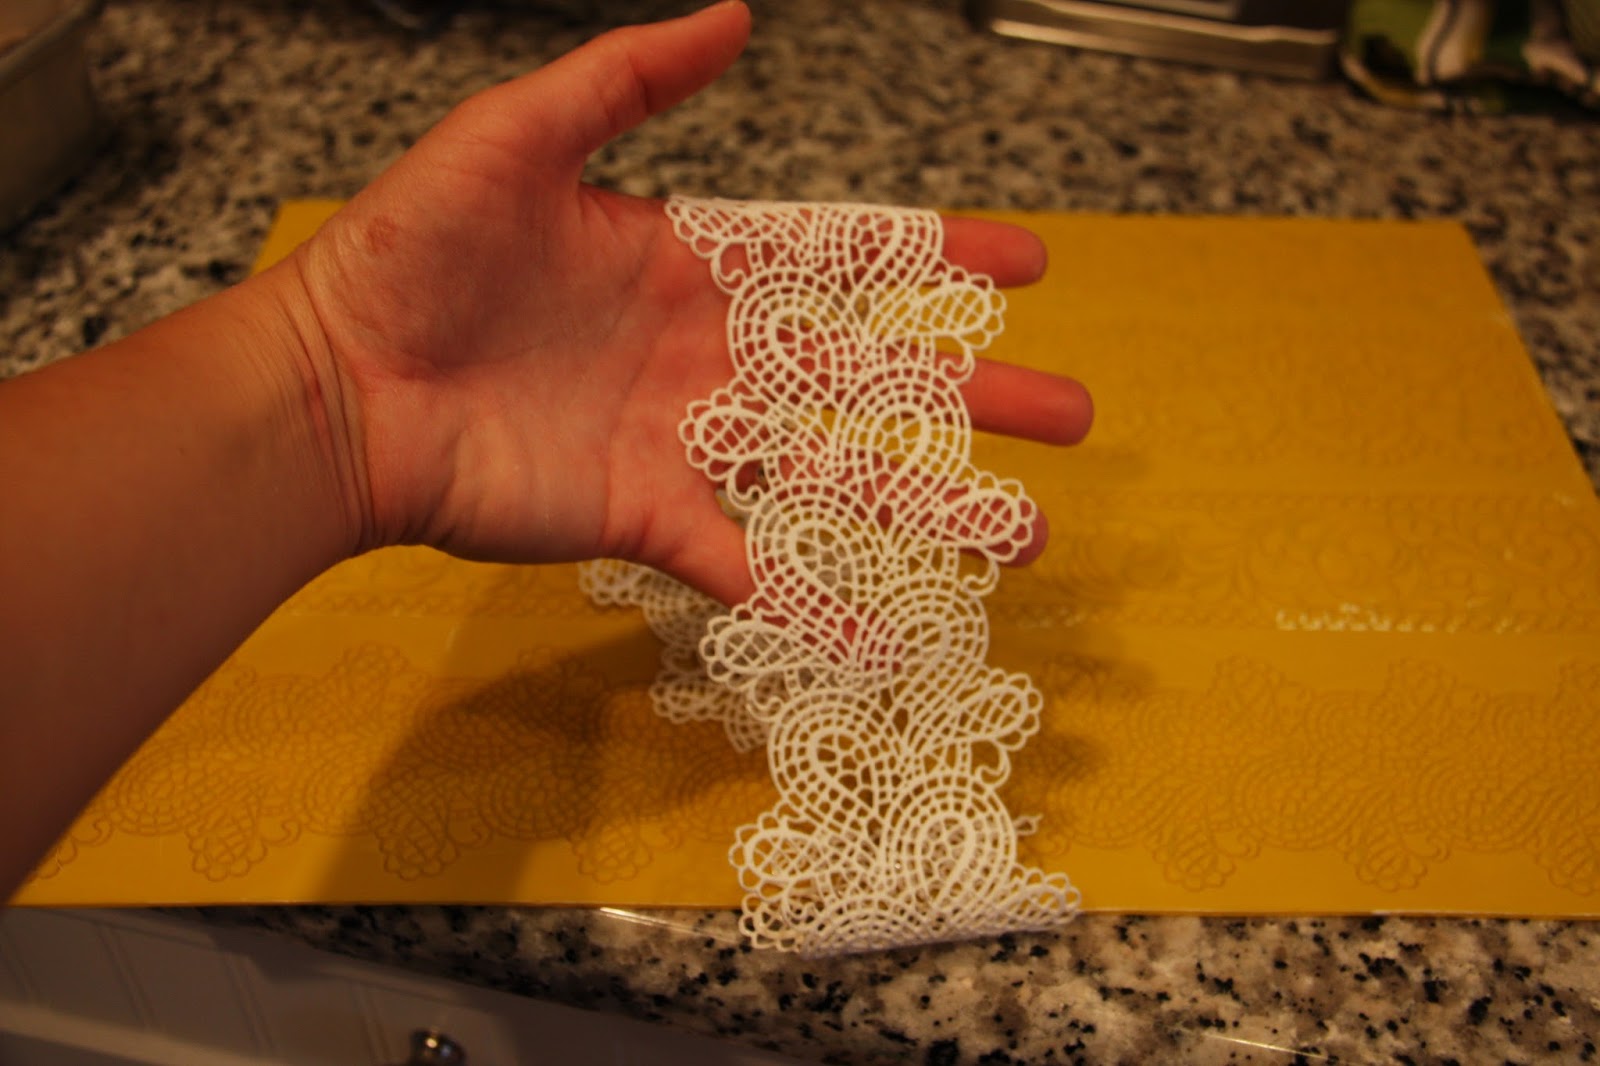
This lace wasn't piped, it's molded!
     Have you ever been piping an elaborate lace design on a cake and thought "MY GOD! THERE MUST BE AN EASIER AND FASTER WAY TO DO THIS!"? Well, the good news is, that there is an easier way to do it, SUGARVEIL! Just what that heck is SugarVeil? Well, SugarVeil is a brand name for a product called "confectionary lace." There's also some other brands like "SugarDress" but from what I can tell, sugarveil arrived on the scene first. It starts as a dry mix, then you add liquid and mix it into sort of a goo. Once it's the right consistency (think, royal icingish) you can pipe it, spread it out or work it into thin silicon molds. You let it set up either at room temperature for a few hours or in a 200 degree oven for a few minutes and you have this magical product that peels away but stays flexible!! You can attach it to your cakes, smooth it over cupcakes or decorate cookies with it. It's totally edible and pretty tasty and it allows you to make a ton of perfect lace quickly.
 
 
  Have I peaked your interest? Let's get into the how-to. For my photos, you should be aware that I
am using "SugarDress." I have, however, recently switched over to working with SugarVeil and saw a lot of really great stuff from them at the ICES convention. In fact, the creator of the product was there to demonstrate how to use it! I'm not an expert on this stuff yet, but it's just so cool and fun to use that even as a novice it was really approachable and I would definitely recommend trying it! Both products work about the same way.
 
Magical White Powder...
No, not that white powder....
This is before icing it up.
   The first thing to do is follow the instructions that come with your product to mix it up to the proper consistency. SugarDress involves a powder and some sort of magic liquid goo, SugarVeil is just a powder that you mix with water. It's pretty straight forward and no more difficult than making a little bit of royal icing.

  SugarVeil has different suggestions for mixing based whether you are going to spread your sugarveil into a mold or pipe it out by hand. If you are going to pipe it, you will want a slightly stiffer consistency. If you are going to spread it into a mold, you will want a runnier consistency so that it will flow into all the nooks and crannies.

SugarDress, silicon mats and tools of the trade.
     If you are going to pipe the SugarVeil you can free-hand it onto a flat surface, which is pretty cool. It makes it a lot easier to pipe than trying to pipe directly on the side of a cake and you could follow a pattern really easily by piping onto transparent acetate over a template. You would then let your design set up completely. Next, and this is the really awesome part, you can peel it up off your acetate and directly apply it to your cake, cookie or cupcake! It's so cool! It's flexible, so it won't snap like royal icing could (but be careful because you can still rip it if you're not careful.) I just about lost my mind the first time I peeled it up! My husband and business partner, it should be noted was less excited than I was.

    If you are going to mold it, you can use one of the many silicone mats that are being made for this
The blue mats and all those packets on the left are my
SugarVeil haul from the ICES convention.
product. There are a ton of different patterns to emulate everything from lace to burlap, spiderwebs to steampunk gears. And, the mats all have a TON of detail. So much detail that it looks like you have real lace on your cake. The downside? The mats aren't cheap. The upside? Hopefully you will save so much on labor while making such gorgeous cakes that it will be worth it. Also, the designs are SO pretty. There are a quite a few brands on the market selling these mats, so shop around for a design you like. Also, some mats have just about a 14" length of design while some bigger mats have 3- 14" lengths. I would really recommend getting the bigger one, otherwise, if you have to cover a whole cake with lace you might get stuck repeating the process over and over again. That would sort of defeat the labor-saving appeal.


   Using the molds is pretty easy. You start with your pourable SugarVeil and you treat it sort of like you are going to grout some tiles. You pour it over your mold and then use an offset spatular or a rubber scraper to spread it over the entire mat. Then, you use a straight edge (like a rubber bowl scraper or on the stiffer scrapers that they sell specifically for this purpose) and you carefully scrape over the entire mat and remove all the excess SugarVeil  that hasn't been pushed into the mold. Once the surface of your mat is clear, you can allow it to dry at room temperature or you can dry it in a 200 degree oven for about 10-15 minutes. I would recommend adding a second coat at this point, then dry it a second time before trying to remove it from the mold.
Above you can see me applying the Sugarveil,
Spreading it out and removing the excess.
   
This how it looks after coming out of the oven.

    Now we're at the exciting part! Once your SugarVeil  is set and you can carefully peel up an edge,
you turn the entire mat over (so the SugarVeil is facedown) and carefully peel the mat away from the lace. This seems to work better than trying to peel the lace up out of the mat when it comes to preventing tears. Try to use an even hand (or your scraper) when peeling the mat away, and keep an eye on the extra delicate parts, they may need a little help out of the mold to prevent tearing.
I know, I'm pulling the sugarveil up exactly like I told you not to. But you might not be able to see it the other way!

    Now you've got some really awesome flexible confectionary lace and it's ready to go onto your cake! You've saved yourself hours of piping time! Your lace looks awesome! Just brush the back with piping gel (or maybe watered down royal icing) and attach it to your cake. You can cut away what you don't need with a pair of scissors of a craft knife. You can also paint your SugarVeil with an airbrush or by hand to add some pop.
It's so flexible and delicate! Seriously,  SO cool.

    If you're not quite ready to put it on your cake, that's totally fine! Another awesome thing about SugarVeil is that you can roll it up, or gently fold it, put it in a plastic baggie and will stay good and flexible for a really long time! We're talking, months! OR you can let it set up hard, store it, then bring it back to life with a little steam or a moist paper towel. HOW COOL IS THAT!? You can get ahead on those wedding cake details for June (when it's crazy) in March (when it's slow)!

My secret shame, I didn't pipe this lace!!
   So, while I really love SugarVeil and I think it's super fun to play around with, I do feel a little www.sugarveil.com and see a bunch of photos of stuff they've made with the product. You can also check out SugarDress products at www.globalsugarart.com where there is also a ton of other decorating product. I don't want you to think I've been paid off by theSugarVeil people, I haven't, I'm not nearly that important!! I'm just really excited about this cool, and still fairly new, decorating product.
guilty when people compliment the lace and I know that wasn't really all that hard to make. That's the kind of person I am, I'm bad at taking a compliment. I will always be more impressed by a cake that is completely hand piped than one which uses molds, but that doesn't mean the cake is any lovelier. I don't think SugarVeil can or should replace all hand piping, but it is a super cool tool that belongs in any cake shop. It also invites creativity to use the SugarVeil  in ways that you can't use royal icing. When I saw their booth at ICES I basically bought everything because it was just SO cool. If you have the chance, check it out. You can buy it from their website
 
    If you are interested in having a beautiful lace cake, but aren't quite prepared to make it yourself, check out our website www.frostedfoxcakeshop.com and get in touch. We'd love to make a gorgeous cake for you, especially if you're interested in using some gorgeous confectionary lace as part of the design. If you enjoyed this, like us on Facebook too (www.facebook.com/frostedfoxcakeshop) and pass it on to your friends! Feel free to message us with any questions you have!

Thursday, August 6, 2015

Cake Conventions and Royal Icing!

   Sorry for the long delay between posts! We had a busy weekend at the ICES conventions in Omaha and we've been playing around with our new decorating toys ever since we got home. My intention is to continue with our little series on icings and talk about royal icing today. Luckily, royal icing and ICES go together like, well, cake and icing.
One of the award winning cakes at the ICES show! This cake traveled all the way from Sri Langka and it's covered with
delicate royal icing string work! Everything red on the cake is super fine piped royal icing.
Me and ICES Hall of Fame Winner Dominic Palazzo!
Bonus: this lady photobombed the crap out of us!
   What's ICES? Well, I'm glad you asked. ICES stands for the International Cake Exploration Society. It was founded 40 years ago and is made up of professional and hobby decorators as well as anyone else who is really interested in the sugar arts. My husband and I joined ICES this past year and this convention was the first time we attended one of the society's meetings. There were demonstrations, hands on classes, a cake competition and a pretty sweet vendor room. What's cool about the ICES show is that there are a lot of really wonderful, world-class, master sugar artists and cake decorators. There are a ton of great tools, supplies and techniques to explore while attending the show. It's a cool place to go to get inspired and to learn something new.

    Now, if I'm being completely honest, the convention wasn't exactly what I was expecting. It seems that membership may be slowing a little bit and attendance at the conventions has been down. My hope is that in future years it will peak again. Apparently Omaha was a little hard for some people to get to. But, we saw great demonstrations and met some great people. I'm already hoping to attend the next convention on the cake circuit (The America's Cake and Sugarcraft Fair) but it depends on whether or not the shop is open by the time the event takes place in Orlando. Also, for the record, we learned at the convention that ICES seems to be pronounced to rhyme with "Pisces."
The central cake is a great examples of many different uses of royal icing.
   So, how does royal icing tie in well with the ICES convention? Well, just about all of the classic decorating techniques utilize royal icing as their medium. Royal icing is basically an icing made of egg whites and confectioner's sugar. Sometimes people add meringue powder, lemon juice or cream of tartar. Sometimes I simply mix confectioner's sugar and water if I need to let the icing flow over a surface (imagine the top of a decorated cookie). You can adjust the consistency of royal icing depending on your desired application, sometimes it is better that it be stiff, and sometimes a more liquid icing is required.
This gorgeous cake has a ton of amazing royal icing piping, collars, brush embroidery and gumpaste flowers!
Note how the lattice work on the second and top tiers stand away form the cake!
   When do you use royal icing? You can ice an entire cake with royal icing if you like, although in the US most people don't ice their cakes with royal icing. It's more common to see it on British cakes where the cake itself is usually very dense fruit cake that doesn't need to be refrigerated. Royal icing will tend to set into a hard shell, so that's another reason why people in the US don't usually use it. I tend to think of royal icing as being a better fit for icing cookies, gingerbread houses or for additional decorating on top of the base layer of fondant or butter cream.

This rounded white mounds are made by
criss-crossing piped strands of royal icing to
 create the"cushion lattice" technique.
    There are many techniques for decorating a cake that require royal icing. String work is a type of decorating that requires the strength and setting ability of royal icing. Collars and color-flow use royal icing to make solid plaques of royal icing. You can also make "lace points" by piping royal icing onto acetate or parchment into pretty designs, then letting it set up stiff, removing it from the sheet and attaching it to the cake.

    Of course, you can also pipe many kinds of flowers with
The central rose on this cake is a
great example of brush embroidery.
royal icing. What's cool about piping flowers our of royal icing is that you can let them set up hard and then apply them to your cake in really cool ways. Once they are set you can paint details onto them as well! Another technique that I love which uses royal icing is called "brush embroidery." With this technique, you pipe a thick outline of royal icing then, before it sets, you use a damp brush to pull the icing towards the center of the design to emulate the look of embroidery. In fact, I used brush embroidery on my wedding cakes!
I made these "UP" themed cookies for
a friend's baby shower. The cookies are iced
with royal icing.

   Another use for royal icing is to decorate cookies. You've probably seen cookies iced with royal icing in countless magazines and pinterest photos. You can either pipe an outline of color with the royal, then fill it in with a thinned out version, or you can dip the flat surface of the cookie into the icing and let that make a thin layer to cover the cookie. Once you've applied this first layer, if you work quickly you can pipe details in that will smooth out flush with the surface, drag a pin through to make designs or add sprinkles and attach other details. If you let the surface set you can pipe on additional details that will sit above the first layer to add depth and texture to your design.

    In our shop we don't use royal icing too often. We do use it decorate cookies, but we will usually use butter cream or fondant for most of our cake and cupcake decorations. While string work, color flow and collars are really cool, they are very traditional and don't seem to appeal to the modern American bride as much as they used to. Now, it's totally possible that they will come back into vogue if ornate cakes cycle back into popularity. In the meantime, it's really important to have those skills in your repertoire so that you can play around with interesting ways to use them. The applications for royal icing are pretty endless, but be aware it can be susceptible to moisture and humidity. Next time, I'll talk about a newer product called "Sugarveil" which is being used to emulate some of the affects you can get from royal icing.

Monday, July 27, 2015

Gumpaste.... The Perfect Medium for Making Cake Decorations!

Gumpaste peonies and fondant ruffles make this cake super sweet!
 
Believe it or not, I made these
roses and blackberries with gumpaste!
   Let's take a little break from talking about the icings that cover a cake, and talk about one of the psuedo-icings that are used to decorate a cake. We're going to talk about gumpaste. Gumpaste is also sometime known as "sugar paste" and to the best of my knowledge they are the same, except that some people think that "sugar paste" sounds prettier. I mean, it does definitely sound prettier, but I am just used to calling it gumpaste. I admit that I switch between the two, so don't hold it against me if I do. I am calling it a pseudo-icing because it's edible, but you wouldn't really use it to ice a cake the way you might use buttercream, cream cheese icing or even fondant.
For this thin rose petal, I used gumpaste.
For the thicker look of the succulents, I used fondant.

    Gumpaste is similar to fondant in a lot of ways. Like fondant, gumpaste is basically an edible sugar dough, but unlike fondant it has some additional ingredients that allow it to stretch thinner and harden faster and drier than fondant would. This makes it better than fondant for making decorations to top a cake. While gumpaste is totally edible, I wouldn't really recommend eating it because it won't really taste very good and it will be very crunchy (imagine eating a sweet porcelain tea cup). Fondant is much better for covering a cake, it tastes better and won't totally dry out. When it comes to making decorations, I tend of think of fondant as play dough and gumpaste as porcelein. Both work for different applications.

Wilton brand makes a
gumpaste that you can
find in craft stores.
    You can make gumpaste yourself from scratch, but like fondant, this is a product that I purchase. It's just more reliable than making it and since you're not supposed to eat it anyway, I'm not as concerned about making it as I am with making the rest of the cake from scratch. If you are interested in playing around with it, you can find it at most craft stores or order it online.

Here are just a few gumpaste cutters.
There are literally hundreds of
special tools for making gumpaste
decorations!
   Whenever you use gumpaste, there are a few things that are
important to bear in mind. It is very important to keep the gumpaste covered in plastic wrap while you work with it, otherwise it will begin to dry out. If that happens, instead of beautiful smooth elastic flower petals, you will get cracks and tears and it won't be pretty. Generally you want to roll the gumpaste out until it is very thin, this makes for the most delicate and realistic flowers, bows, and other decorations. You can use a clean pasta roller to make this easier. After you've cut out the shapes you want, you can use a spongy base and a "ball tool" to thin the edges and create a ruffled or cupped affect. There are a wide variety of gumpaste cutters, molds and tools to get all kinds of different effects when you work. I'll try to go into some of them in a later post.
I started with white gumpaste
and dyed it to make these
different shades! You can see
way I allow my decorations
to dry.

    The gumpaste starts out white, but it can be colored with food coloring (powders or gels will work best without making it too sticky). You can also spray the finished decorations using an airbrush and special thin airbrush ready food coloring. Then, you can create an even more detailed and realistic look by dusting your decorations with petal or luster dusts that will give your decor a more full, natural look. If you are building something that requires attaching pieces together you can use "gum tragacanth" or thinned out gumpaste as edible glue. I simply paint it on where I need it and glue the pieces to one another.

    Once you have made your decorations, you should let them sit for a few days before you attempt to add petal dusts or use them on a cake, otherwise they will be too soft and saggy to use. Sometimes, if you are working on a more complicated decoration, you may have to work in stages, allowing the first pieces to dry before adding more. In this way, gumpaste decorations can be very time consuming to make and require a high skill level from the decorator.  In the decorating world there are real masters of sugar paste like Sylvia Weinstock and Ron Ben Israel, who are both known for their exquisite and realistic sugar paste flowers. A wedding cakes from either of their shops can cost thousands and thousands of dollars!
The flowers, foxes, acorns and mushrooms are all gumpaste!

    It's a lot of fun working with gumpaste. I really love making flowers and other delicate decorations using it as a medium. It takes a lot of patience and organization to make sure that your pieces turn out well (and don't take you a million years). While I really love making the decorations, since they are very time consuming to make, they can be quite expensive. Some clients prefer to use real flowers on their cakes since they can be less expensive. Now that you know a little bit about gumpaste, consider using it for decorations on your cake. I think it can be well worth the cost to have a truly breathtaking centerpiece cake complete with amazing gumpaste decorations! Check out the rest of our photos on our website www.frostedfoxcakeshop.com for more examples of gumpaste and fondant decorated cakes.

Monday, July 20, 2015

In Defense of Fondant

A fondant covered cake, complete with fondant ruffles.

      In my last post I wrote a lot about buttercream icing. Today I wanted to talk about another type of icing all together: FONDANT! I love working with fondant and many of my cakes are covered in fondant (you can see pictures here). Sadly, fondant has gotten a bad reputation as of late.  It seems that lots of people love the look, but have this idea that it tastes terrible. I can't tell you how many people I've spoken to who say "I hate fondant! We DEFINITELY don't want fondant on our cake!" Well, today I'm going to make a controversial argument. A fondant cake can look great and taste great!

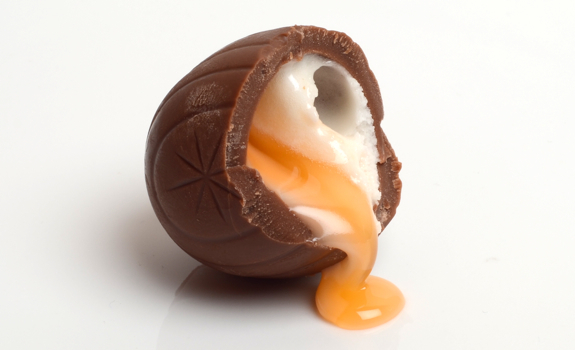
The center of this egg is also
fondant!
    You might be wondering "what exactly
 is fondant?" Fondant is a sugar based dough that can be kneaded, rolled thin, and smoothed over a cake. If you've ever seen a wedding cake with a super smooth look, it was probably covered with fondant. There are also different types of fondant. There is fondant that is stiff and intended to be rolled out and layered onto a cake and there is also fondant that is used in a more liquid form to create a glaze or a filling for a confection (picture the filling in a cadbury cream egg).
 
This is my favorite brand of fondant.
    You can try to make fondant yourself, it's basically just a ton of confectioners sugar, but it's sort of a nightmare to make and will probably either kill your mixer or your wrists. I prefer to buy mine (it's one of the few elements that we work with that we don't make ourselves. There are many different brands of fondant and some brands are better than others to work with or to eat. I find that the "Massa Ticino" fondant by Carma is both easy to use and tastes quite good! It's sweet without much additional flavor or an aftertaste, sort of like a marshmallow. It also holds up pretty well against high-humidity environment which can cause fondant to get slimy or melt if it absorbs too much moisture. It's definitely not the most affordable brand, but it's the one that I enjoy using and it has successfully converted many of the fondant-phobic into fondant-lovers (or at least they don't hate it anymore!)

Properly applied fondant is smooth
and has an even color tone.
      There are many reasons why it's a great idea to consider using fondant on your cake. It has a super smooth look that you just can't duplicate with buttercream. If you want a pure white cake, fondant is much whiter than buttercream (which is off-white). It is more resilient in the heat and can prevent your cake from melting or showing signs of melting. It provides more structure to a cake, particularly if you are going to be making a very large cake like a big wedding cake. It holds color better than buttercream icing, which means your black and orange halloween cake is less likely to stain the mouths of your guests. There are certain techniques and looks that are difficult or impossible to replicate in a different type of icing. Last but not least, some people even love the taste of a fondant!
   
A fondant sheeter rolls the fondant
out to the perfect thickness.
     Have I convinced you to give fondant a chance yet? Let me tell you how we use it, maybe that
will allay some of your fears.  We strongly recommend using fondant on any cakes larger than 2 tiers, especially if they are destined for a warm environment (which is anything above room temperature). We do this so that your cake will be safe and sound until it is served. Don't worry though, whenever we use fondant on a cake we always make sure that it sits on top of a nice, thick layer of vanilla buttercream icing. So you get the great flavor of the buttercream and the structure of the fondant. We also make sure to roll our fondant very thin with a sheeter (picture a giant pasta machine) so it doesn't affect the overall taste or texture of the cake very much.

Sean, my husband, is putting a crumb
coat on this cake.
    When I cover a cake with fondant I always start by giving the cake a nice, thick layer of buttercream icing. This is called the "crumb coat" and it seals all the crumbs into the cake and gives it super straight and smooth base. If you didn't crumb coat your cake with buttercream first, your fondant will probably look very lumpy and you may be able to see dark patches where your cake shows though. This is never a good look! Once you've crumbed your cake, put it it the fridge to let it set up like cold butter. This will help maintain your nice straight corners and sides. I usually begin to knead my fondant in confectioners sugar until I have a nice smooth ball. I squash it flat and begin to roll it out, either by hand or with the sheeter, until it is about 1/8" thick and wide enough to cover my cake completely. I use confectioner's sugar to prevent the fondant from sticking and I never flip it over to make sure the outer surface will be perfectly smooth and clean.
Not only is this cake covered
in a layer of fondant, but all
of the decorations are fondant
as well.
   
      This next part takes a little practice. I pick my fondant up and place it over my cake. I usually try to smooth the top down very quickly and then I smooth the fondant over the top 1" of the sides of the cake. It will look like a tablecloth, but if you carefully stretch the fondant while smoothing it against the sides of the cake you can work all the folds out until it is totally smooth without any rips, tears, divots or folds. Like I said, this takes some practice. I find that the taller a tier is, the more challenging it can be to smooth the sides without any marks. I also think it is easier to smooth a round cake than a square cake since it is more challenging to navigate the corners. If you have marks or aren't happy with the layer, you can carefully remove it, re-crumb your cake and try again. Another great hint is to use your decorating elements to hide any flaws you have. This can only do so much, though.

This close up of the house in
process shows how you can
texture fondant.
     Once the cake is successfully covered with fondant you can do all kinds of fun things to decorate it. You can pipe onto the cake with royal icing or buttercream. You an add texture to your cake with quilting, ruffles, crimpers, or an impression mat. You can paint directly onto your cake with an airbrush or by hand with buttercream or food coloring. You can roll out more fondant and cut out shapes, then stick them to your cake. You can also use fondant to make the decorations that will go onto you cake like figures, logos, molded items or even some flowers. It's a great way to make your decorations enjoyable to eat, as opposed to using gumpaste which is edible, but you really don't want to eat it.
 
    I hope I've convinced you that fondant can be a great addition to your cake. I really love working with it. Remember, if you still don't like it, you can just peel it off your slice of cake and stick to the buttercream!

Thursday, July 16, 2015

The Beautiful World of Buttercreams!

These are some of our flavored buttercream icings!
   Let's talk about icing! There are many different types of icings in the world and each has it's own
different taste and application. There are a wide range of different textures and tastes and everyone has their favorite. Depending on where you live, you may be more familiar with one style over another. In fact, if you compare decorating cultures (for example, comparing the US to Great Britain) there can be extremely different approaches to how one should ice a cake and with what type of icing! There are buttercreams, fondant, cream cheese icing, gumpaste, royal icing, pastillage, marzipan, ganache, glazes, and modeling chocolate that can all be used to cover or decorate a cake! (To see some cakes that I've made and decorated with a variety of icings, check our www.frostedfoxcakeshop.com). Today, I'm going to focus on buttercreams and then I'll go over some of the other varieties in future posts.
 
A pre-made buttercream.
Not my favorite style of icing!
    I believe that when most people think about buttercream, they are usually thinking of that super sweet icing that you might find on a supermarket cake. Now, that icing has its place and its fans, but in my opinion, it's just not buttercream. I find it to be too sweet and frequently gritty (it's basically sugar, shortening and a bunch of preservatives and stabilizers). REAL buttercream is made with butter (duh). It should be sweet, but not tooth-achy sweet, smooth, creamy and light. It's best eaten at room temperature so that the icing has a chance to soften, otherwise it can be too much like eating a cold stick of butter. This is an extremely popular type of icing, but did you know there are many different styles of buttercream?
The real stuff!
 
    That's right, there are many varieties, among them "American Buttercream," "Italian Meringue," "Swiss Meringue," "French Meringue" and "French." "French Buttercream" is very rich as it is made with butter, sugar and egg yolks. "Italian Meringue Buttercream," French Meringue Buttercream" and "Swiss Meringue Buttercream" are made with a meringue base (egg whites) into which sugar and butter are added (they are named after the type of meringue used in the icing). Of course, you can leave it to us Americans to come up with the simplest style of buttercream, in our version, usually the butter is creamed with confectioner's sugar and then sometimes milk is added to make it smoother.
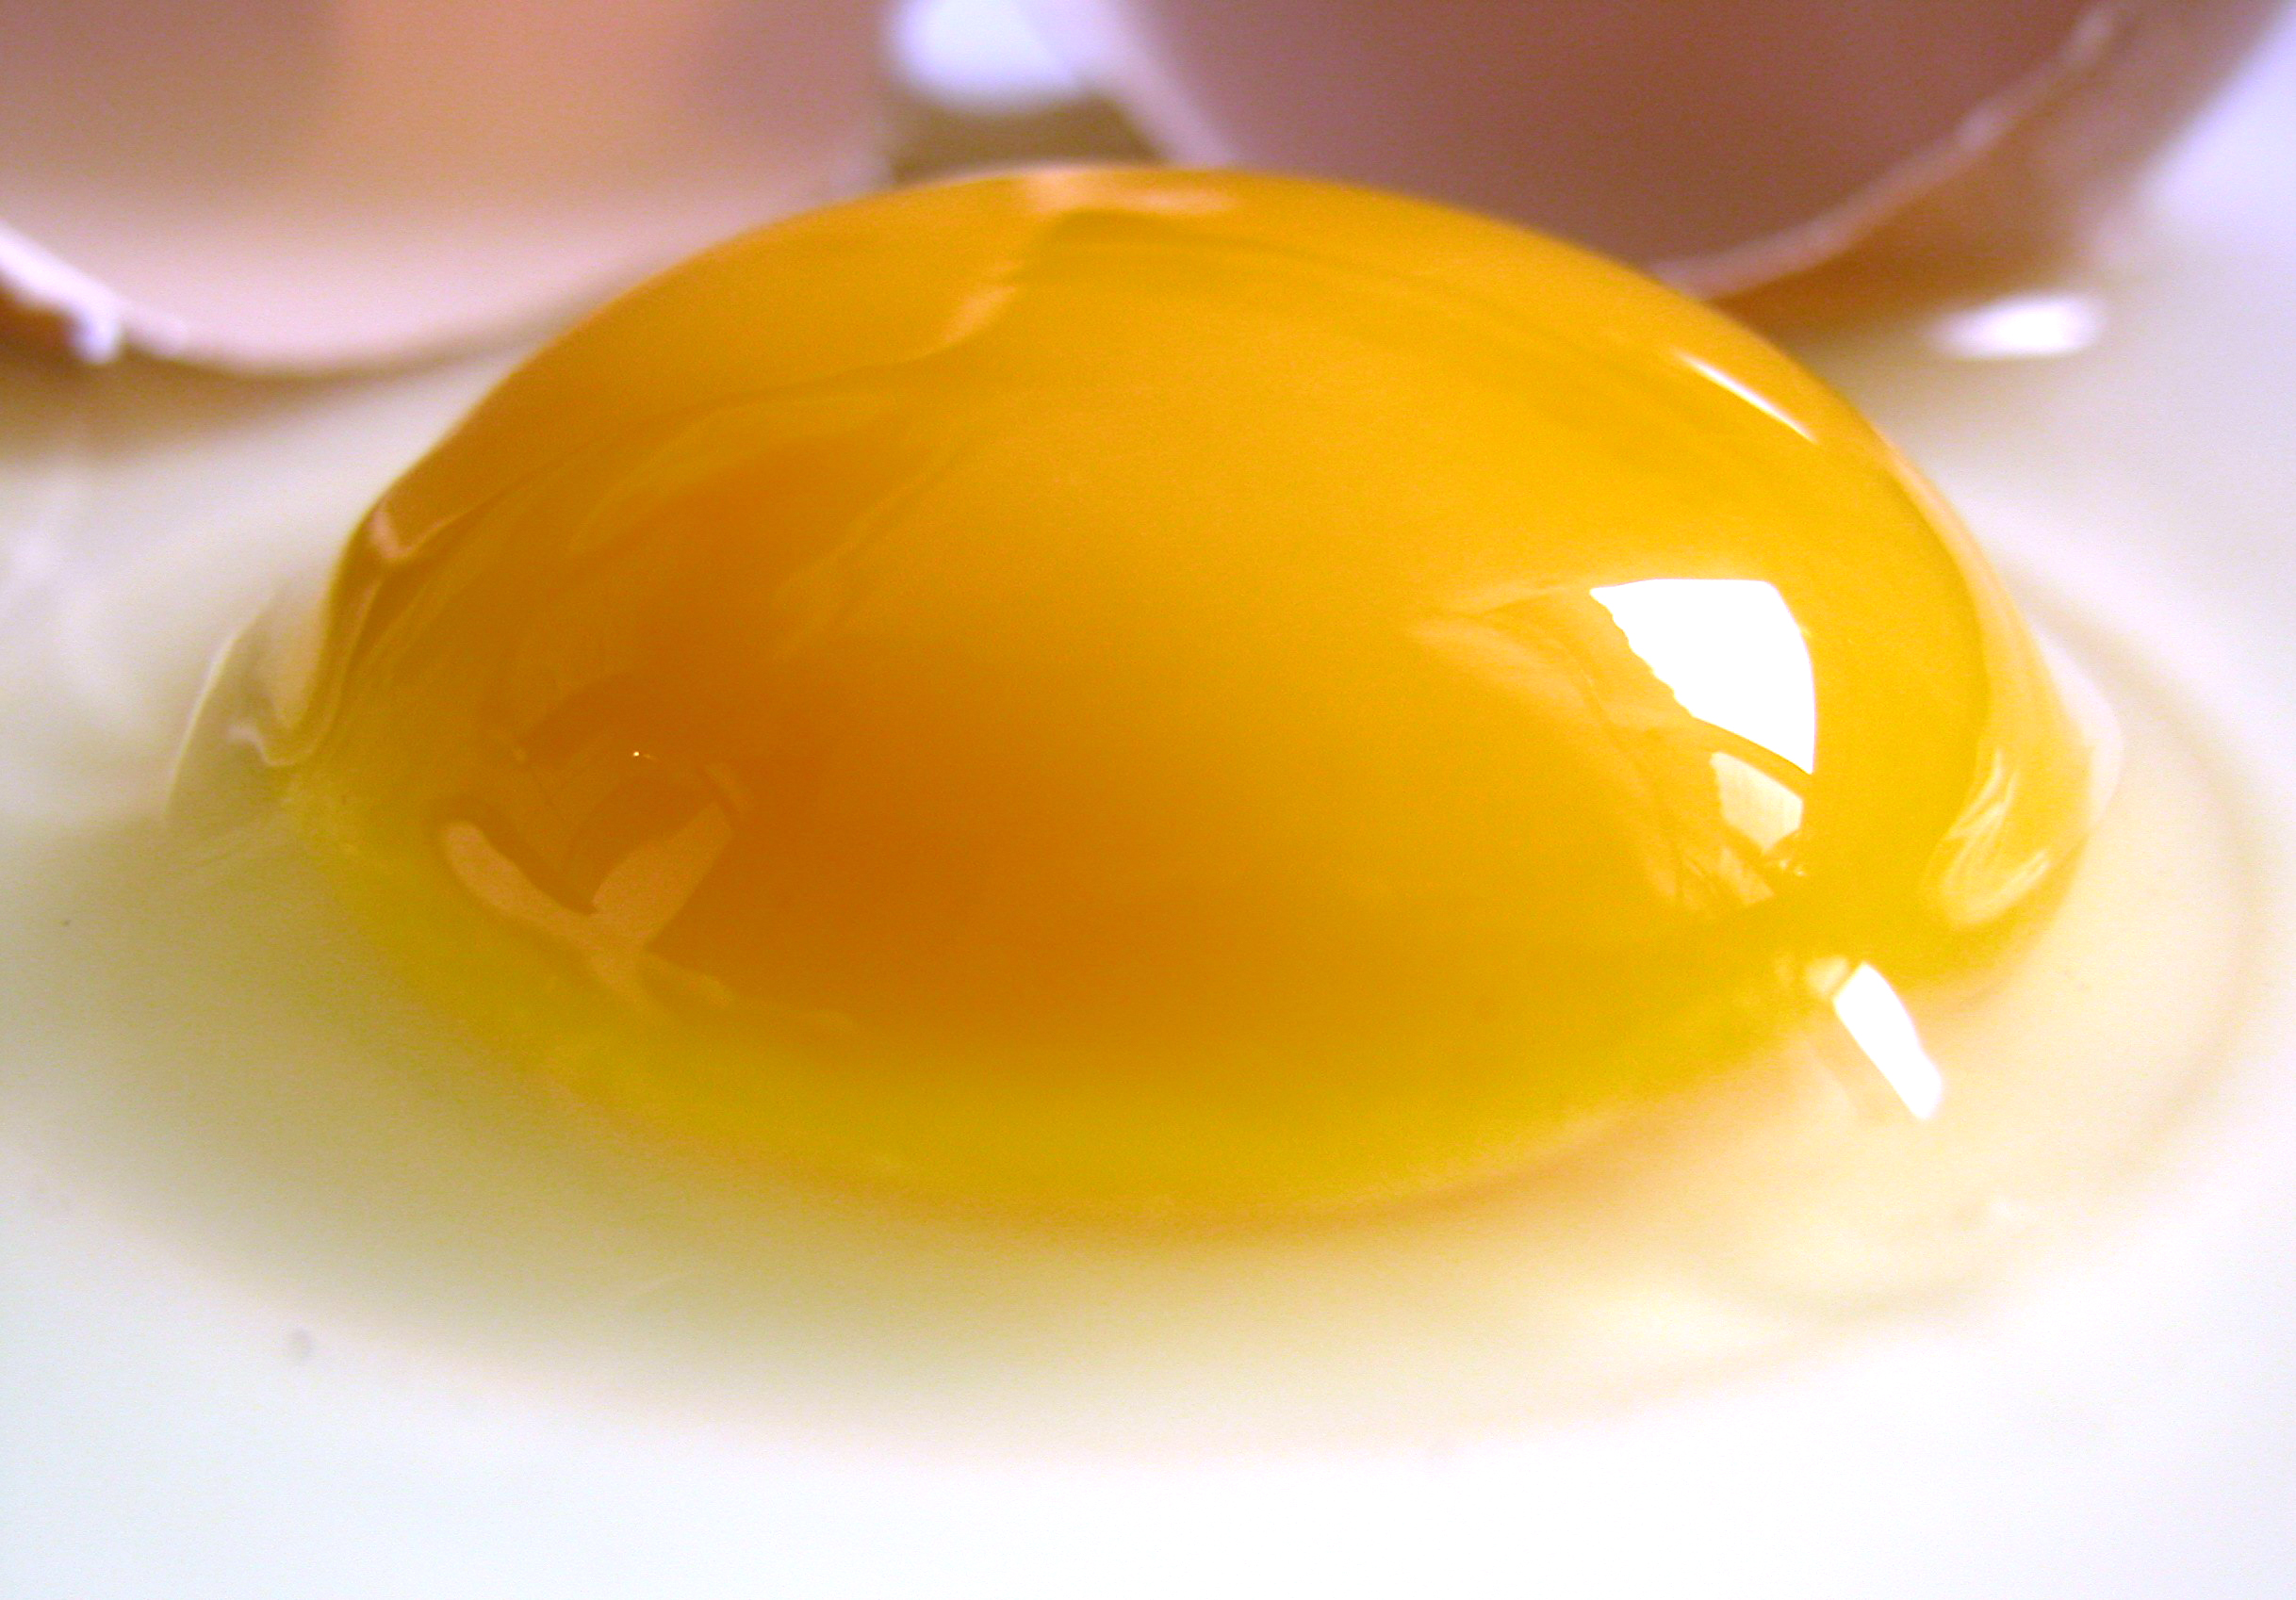
Yolks form the basis of French
Buttercream.
 
   Why would you need so many different styles of buttercream? Well, each one has different pros and cons. French buttercream is very rich, it's delicious but it can be too rich for a strongly flavored cake. It also has a tendency to be more yellow than other buttercreams thanks to the presence of the egg yolks in the pate a bombe base. It also has a tendency to be more susceptible to heat. It works best as a filling for cakes or other pastries that use buttercream. Another drawback to french buttercream is that it can be more difficult to make than other versions since it requires making a pate a bombe. It is also possible that the egg yolks will not reach a "food safe" temperature so it could be potentially risky in the same way that eating eggs over easy can be a little risky for certain populations. Given all the cons, I don't really make this buttercream, it's just not quite what I look for in an icing.
Our chocolate icing is
an American Style
Buttercream.
 
    If we swing the difficulty pendulum in the opposite direction we come to "American Buttercream." This is what many of our elders might have made for our birthday parties. You simply beat butter until it is creamy, add a whole lot of confectioner's sugar, a little vanilla, a little milk, then beat the crap out of it until it is smooth and silky. This buttercream is quite tasty, although it is definitely quite sweet. Not as sweet as the store bought stuff, but still pretty sweet. It is pretty easy to work with, but is also quite susceptible to heat. The chocolate icing we make is a variety on this style of buttercream (we add cocoa) but when it comes to our vanilla buttercream I like to make a meringue based version.
With Swiss Buttercream you heat
the egg whites and sugar together
over a water bath.
   
    There are three meringue based buttercreams. "French," "Italian," and "Swiss;" each are named after the style of meringue used to make the buttercream base. In all three versions, a meringue is made, and then room temperature butter is added in and whipped until it is silky smooth. You start with this airy meringue, then start to add your butter, and eventually you have this "oh crap!" moment when it breaks and it looks like it will never work, but then it magically starts to come back together and form a beautiful, smooth emulsion! In the "French" style, the you simply add dry sugar into you egg whites as they whip. The two big drawbacks of this style are that it isn't as stable as the other two AND since the whites are not cooked, it's not really up to US food safety standards.
 
In an Italian Buttercream the 240 F
sugar syrup is poured into the
egg whites to make a stable meringue.
 "Swiss Buttercream" is made by heating the egg whites and sugar together over a water bath until they reach a food safe temperature, then you whip the whole thing until it's voluminous and cool to the touch. This is the most food safe version of buttercream, but can take a little longer to make and is slightly less stable in heat than it's cousin, "Italian Buttercream." "Italian Buttercream" is the most stable buttercream because it is made from the most stable meringue. In this version, the sugar is cooked with water to the 240 F, then you pour the hot syrup into the whites as they whip and it forms a very strong meringue. This is the trickiest method to make, but I think it is worth it as the icing is great for decorating and it is food safe, delicious, sweet, and has a great mouth feel. This is my preferred icing and it is how I usually make my buttercream.
   
   All of these buttercreams can be flavored in a wide variety of ways. You can use jams, extracts, liquors, custards, pastes, chocolate and pretty much anything else as long as it can be blended into a high-fat emulsion. I do want to note, however, that when you add flavors, it can change the texture of your icing causing it to break or loosen if you add too much. You can adjust the consistency by adding more confectioner's sugar of liquid, but it's a delicate balance. You can see the full list of our flavors on our website www.frostedfoxcakeshop.com for some ideas.
 
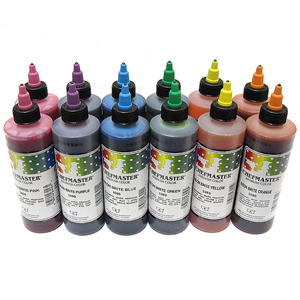
Food colors can be added to make
the buttercream any shade you want!
 Real buttercream is naturally off-white or ivory thanks to the butter, but it's a really beautiful natural, soft shade.You can also color your buttercreams almost any shade in the rainbow! I find that gel colors work the best for buttercream as watery food colors don't really mix into the emulsion very well and give a spotted affect. Also, it's worth mentioning that if you are going to deep, intense colors, they can often come off on your guests lips as they eat, so fair warning if you are looking for an all-black wedding cake, you may be in for a surprise when you see your wedding photos!
   
   All true buttercreams have one major enemy, heat. They all have the potential to melt if they are being held in a hot environment like, say, an outdoor summer wedding. However, some of them are a little more stable than others in heat. They can also be tricky to work with in a hot kitchen where than can be loose and kind of frustrating. This is why many people use shortening as a base, it's more heat stable, but I just don't think it tastes as good as butter or has as nice a mouth feel as real butter. Another potential drawback for buttercream is that it can be a challenge to create a perfectly smooth, blemish-free surface. Also, there are some techniques that just can't be done with buttercream.  While I believe that buttercream is one of the best tasting icing options,  it does have its limits.  That's why it's important to consider using the other icing options in conjunction with the buttercream. Next time, we're going to talk about that controversial F-word: FONDANT!