Monday, July 27, 2015

Gumpaste.... The Perfect Medium for Making Cake Decorations!

Gumpaste peonies and fondant ruffles make this cake super sweet!
 
Believe it or not, I made these
roses and blackberries with gumpaste!
   Let's take a little break from talking about the icings that cover a cake, and talk about one of the psuedo-icings that are used to decorate a cake. We're going to talk about gumpaste. Gumpaste is also sometime known as "sugar paste" and to the best of my knowledge they are the same, except that some people think that "sugar paste" sounds prettier. I mean, it does definitely sound prettier, but I am just used to calling it gumpaste. I admit that I switch between the two, so don't hold it against me if I do. I am calling it a pseudo-icing because it's edible, but you wouldn't really use it to ice a cake the way you might use buttercream, cream cheese icing or even fondant.
For this thin rose petal, I used gumpaste.
For the thicker look of the succulents, I used fondant.

    Gumpaste is similar to fondant in a lot of ways. Like fondant, gumpaste is basically an edible sugar dough, but unlike fondant it has some additional ingredients that allow it to stretch thinner and harden faster and drier than fondant would. This makes it better than fondant for making decorations to top a cake. While gumpaste is totally edible, I wouldn't really recommend eating it because it won't really taste very good and it will be very crunchy (imagine eating a sweet porcelain tea cup). Fondant is much better for covering a cake, it tastes better and won't totally dry out. When it comes to making decorations, I tend of think of fondant as play dough and gumpaste as porcelein. Both work for different applications.

Wilton brand makes a
gumpaste that you can
find in craft stores.
    You can make gumpaste yourself from scratch, but like fondant, this is a product that I purchase. It's just more reliable than making it and since you're not supposed to eat it anyway, I'm not as concerned about making it as I am with making the rest of the cake from scratch. If you are interested in playing around with it, you can find it at most craft stores or order it online.

Here are just a few gumpaste cutters.
There are literally hundreds of
special tools for making gumpaste
decorations!
   Whenever you use gumpaste, there are a few things that are
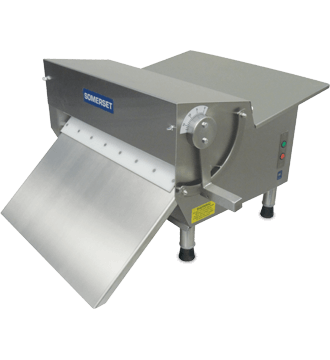
important to bear in mind. It is very important to keep the gumpaste covered in plastic wrap while you work with it, otherwise it will begin to dry out. If that happens, instead of beautiful smooth elastic flower petals, you will get cracks and tears and it won't be pretty. Generally you want to roll the gumpaste out until it is very thin, this makes for the most delicate and realistic flowers, bows, and other decorations. You can use a clean pasta roller to make this easier. After you've cut out the shapes you want, you can use a spongy base and a "ball tool" to thin the edges and create a ruffled or cupped affect. There are a wide variety of gumpaste cutters, molds and tools to get all kinds of different effects when you work. I'll try to go into some of them in a later post.
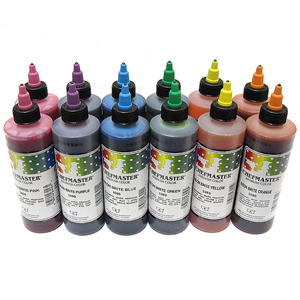
I started with white gumpaste
and dyed it to make these
different shades! You can see
way I allow my decorations
to dry.

    The gumpaste starts out white, but it can be colored with food coloring (powders or gels will work best without making it too sticky). You can also spray the finished decorations using an airbrush and special thin airbrush ready food coloring. Then, you can create an even more detailed and realistic look by dusting your decorations with petal or luster dusts that will give your decor a more full, natural look. If you are building something that requires attaching pieces together you can use "gum tragacanth" or thinned out gumpaste as edible glue. I simply paint it on where I need it and glue the pieces to one another.

    Once you have made your decorations, you should let them sit for a few days before you attempt to add petal dusts or use them on a cake, otherwise they will be too soft and saggy to use. Sometimes, if you are working on a more complicated decoration, you may have to work in stages, allowing the first pieces to dry before adding more. In this way, gumpaste decorations can be very time consuming to make and require a high skill level from the decorator.  In the decorating world there are real masters of sugar paste like Sylvia Weinstock and Ron Ben Israel, who are both known for their exquisite and realistic sugar paste flowers. A wedding cakes from either of their shops can cost thousands and thousands of dollars!
The flowers, foxes, acorns and mushrooms are all gumpaste!

    It's a lot of fun working with gumpaste. I really love making flowers and other delicate decorations using it as a medium. It takes a lot of patience and organization to make sure that your pieces turn out well (and don't take you a million years). While I really love making the decorations, since they are very time consuming to make, they can be quite expensive. Some clients prefer to use real flowers on their cakes since they can be less expensive. Now that you know a little bit about gumpaste, consider using it for decorations on your cake. I think it can be well worth the cost to have a truly breathtaking centerpiece cake complete with amazing gumpaste decorations! Check out the rest of our photos on our website www.frostedfoxcakeshop.com for more examples of gumpaste and fondant decorated cakes.

Thursday, July 23, 2015

Cream Cheese, Not Just For Bagels!

   Let's continue our discussion of icings with a perennial fan favorite, that's right, we're going to talk
This doesn't even have cream cheese in it!
about CREAM CHEESE ICING! It's SO delicious! Doesn't it just sound delightful? Don't you just want to scoop it up with a spoon and eat it on a chocolate chip cookie? I do, I really really do. Now, you can buy it in a can from the supermarket, but it's just not going to be the same as the really real good stuff. I strongly recommend making it yourself, it's pretty easy to make and it will actually have cream cheese! Like everything, though, it does have its drawbacks. It's definitely more challenging to work with than buttercream icing, and it is a lot pickier when it comes to what temperatures it likes.
Red Velvet with Cream Cheese Icing!
    
   Cream Cheese Icing is a delicious alternative to buttercream. Some people can find buttercream to be a little too, well, buttery (not me, but some people do). Cream cheese icing has a pleasantly grainy quality to it (sounds weird, I know) and it develops a nice kind of crust that some people like on their icings. It's also sweeter than our buttercream, so for people who really love their desserts sweet, cream cheese icing is a great option. 

 
  Do you love red velvet cake? You actually love cream cheese icing. Do you love carrot cake? You probably ALSO secretly love cream cheese icing. There are quite a few cakes that are almost always iced with cream cheese icing because it really complements the cake. While buttercream is great, I can't really think of that many cakes that must be made with buttercream icing to be right. It has a real nostalgia quality that just can't be matched.

You can color your cream cheese icing
like I did on these pumpkin cupcakes.
    If you've never had cream cheese icing, it is a lot like the american style buttercream we talked about in an earlier post. It's pretty simple to make. For ours we beat together a pound of room temperature cream cheese with 12 oz of room temperature butter. Then we add in 28.8 oz of sifted confectioner's sugar. Once it's all in, we add 1/3 fl. oz of vanilla (2 teaspoons) and let the kitchenaid beat the crap out of it until it is stiff and white. So, making it is pretty darn easy. However, any cake decorator can tell you that sometimes it just doesn't want to cooperate when you start to ice your cake.

These Carrot cupcakes want to warn you:
Beware the dark side of cream cheese icing!
    The dark side of cream cheese icing is that you have to get the consistency just right when icing the cake, or it can be really frustrating. It has a tendency to be gooey, sticky, soft and stiff (in a bad way) all at the same time. So what can happen is that your beautiful sharp corners that you worked so hard to achieve at the top of your cake will start to droop and sag, making them a rounded mess. You're sides start to slope so that your icing is thicker at the base than the top! You're icing can be sticky and stiff in a way that simply pulls crumbs off the cake and into the icing. Worst of all, if you room is too warm, it can be a real struggle to stop the icing from basically melting all over your cake! But fear not, it just takes some practice and some know-how to get it to be your friend. I've worked with it for about 8 years now and can get it to be as pretty as my buttercream cakes.

    Here are my tips for icing a cake with cream cheese icing if you want to make your life a little easier and your cake a little nicer:
   DO work with it cold, the colder it is, the stiffer it will be. 
   DON'T try to work with it in a hot kitchen or when the icing is warm. The warmer it is, the meltier, gooier and messier it will be. This makes it really hard to get clean edges and corners.
   DO make sure the cake you are icing is nice and chilled, frozen is ideal. 
   DON'T get inpatient and try to ice your cake while it is still warm. You're just asking for crumbs, broken layers and heartache.
   DO beat the crap out of your icing with a kitchenaid. Beat it until it is quite white and stiff. This could take 5-10 minutes. It will start to get more matte looking, as well. 
   DON'T try to ice it with cream cheese icing that is yellowish, grainy, wet-looking, or sticky. Put that stuff on the mixer and let it go until it's white and stiff!
   DO plan to do a crumb coat, then freeze it solid before you apply your finish coat. This will give you the prettiest looking cake and keep crumbs out of the way. It will make your life much easier.
   DON'T try to use this icing if you cake is going to sit out in the sun or heat. It's just not going to stay nice, it will sag, droop and melt. Keep it in the AC, please. 
   DON'T try to ice a tiered cake with cream cheese icing. I mean, you can try, but I wouldn't recommend it (at least not the real stuff, I can't account for people who use cream cheese icing full or stabilizers, maybe theirs works on a 6 tiered wedding cake). The reason I don't use it is that it's just a softer icing that never really sets up with the same strength as buttercream or fondant. Your cake could start to smoosh under it's own weight. Cream cheese icing is much better suited to single tiers and cupcakes. 
   DO use cream cheese icing on your smaller cakes. It's just delicious and it works with so many different flavor combinations. It is a sweet icing, but it also has that great savory element from the cream cheese. I also highly recommend adding a little cinnamon and putting it on pumpkin pound cake!
   DON'T plan to use this for your piped decorations. Try buttercream instead, it will set up much better and be a more reliable piping consistency. 
   DON'T try to cover a cream cheese cake with fondant. Your edges won't look nice, use buttercream instead. 
   DO re-whip your cream cheese icing periodically, especially if you've had it in the fridge for more than an hour or two. 

DO add cinnamon and make
pumpkin cupcakes with Cinnamon
Cream Cheese icing!
     Those are some of the DO's and DON'Ts that I've learned over the years. Remember that every recipe is different, so feel free to experiment. You may have some tricks of your own for taming the beast. If it's still proving difficult, take heart, it can happen to all of us. For example, two weeks ago I drove some red velvet cake layers and a batch of cream cheese icing up to New Hampshire for my Nai Nai's 90th birthday. My first mistake was trying to work in a different kitchen, this is always a bad decision. Next, I really wanted to make this a strawberry short cake variation, so my filling was very loose, probably not the best plan for a cake getting cream cheese icing. I wasn't too worried though, until I put my mom's hand mixer into the icing and PROMPTLY KILLED THE MOTOR! This meant I wasn't going to be able to beat the icing to the proper consistency discussed above. This made icing the cake much much more challenging. After about 30 minutes in icing hell, and 2 crumb coats and some time in the freezer, I finally managed to get that icing to behave and was able to make a pretty looking cake for my Nai Nai. The moral of the story? Don't give up. When it doubt, let the cake chill and don't lose hope! The cake looked beautiful and tasted delicious, and in the end, that's what matters.
It all worked out in the end with this
red velvet/strawberry shortcake with cream cheese icing.

Monday, July 20, 2015

In Defense of Fondant

A fondant covered cake, complete with fondant ruffles.

      In my last post I wrote a lot about buttercream icing. Today I wanted to talk about another type of icing all together: FONDANT! I love working with fondant and many of my cakes are covered in fondant (you can see pictures here). Sadly, fondant has gotten a bad reputation as of late.  It seems that lots of people love the look, but have this idea that it tastes terrible. I can't tell you how many people I've spoken to who say "I hate fondant! We DEFINITELY don't want fondant on our cake!" Well, today I'm going to make a controversial argument. A fondant cake can look great and taste great!

The center of this egg is also
fondant!
    You might be wondering "what exactly
 is fondant?" Fondant is a sugar based dough that can be kneaded, rolled thin, and smoothed over a cake. If you've ever seen a wedding cake with a super smooth look, it was probably covered with fondant. There are also different types of fondant. There is fondant that is stiff and intended to be rolled out and layered onto a cake and there is also fondant that is used in a more liquid form to create a glaze or a filling for a confection (picture the filling in a cadbury cream egg).
 
This is my favorite brand of fondant.
    You can try to make fondant yourself, it's basically just a ton of confectioners sugar, but it's sort of a nightmare to make and will probably either kill your mixer or your wrists. I prefer to buy mine (it's one of the few elements that we work with that we don't make ourselves. There are many different brands of fondant and some brands are better than others to work with or to eat. I find that the "Massa Ticino" fondant by Carma is both easy to use and tastes quite good! It's sweet without much additional flavor or an aftertaste, sort of like a marshmallow. It also holds up pretty well against high-humidity environment which can cause fondant to get slimy or melt if it absorbs too much moisture. It's definitely not the most affordable brand, but it's the one that I enjoy using and it has successfully converted many of the fondant-phobic into fondant-lovers (or at least they don't hate it anymore!)

Properly applied fondant is smooth
and has an even color tone.
      There are many reasons why it's a great idea to consider using fondant on your cake. It has a super smooth look that you just can't duplicate with buttercream. If you want a pure white cake, fondant is much whiter than buttercream (which is off-white). It is more resilient in the heat and can prevent your cake from melting or showing signs of melting. It provides more structure to a cake, particularly if you are going to be making a very large cake like a big wedding cake. It holds color better than buttercream icing, which means your black and orange halloween cake is less likely to stain the mouths of your guests. There are certain techniques and looks that are difficult or impossible to replicate in a different type of icing. Last but not least, some people even love the taste of a fondant!
   
A fondant sheeter rolls the fondant
out to the perfect thickness.
     Have I convinced you to give fondant a chance yet? Let me tell you how we use it, maybe that
will allay some of your fears.  We strongly recommend using fondant on any cakes larger than 2 tiers, especially if they are destined for a warm environment (which is anything above room temperature). We do this so that your cake will be safe and sound until it is served. Don't worry though, whenever we use fondant on a cake we always make sure that it sits on top of a nice, thick layer of vanilla buttercream icing. So you get the great flavor of the buttercream and the structure of the fondant. We also make sure to roll our fondant very thin with a sheeter (picture a giant pasta machine) so it doesn't affect the overall taste or texture of the cake very much.

Sean, my husband, is putting a crumb
coat on this cake.
    When I cover a cake with fondant I always start by giving the cake a nice, thick layer of buttercream icing. This is called the "crumb coat" and it seals all the crumbs into the cake and gives it super straight and smooth base. If you didn't crumb coat your cake with buttercream first, your fondant will probably look very lumpy and you may be able to see dark patches where your cake shows though. This is never a good look! Once you've crumbed your cake, put it it the fridge to let it set up like cold butter. This will help maintain your nice straight corners and sides. I usually begin to knead my fondant in confectioners sugar until I have a nice smooth ball. I squash it flat and begin to roll it out, either by hand or with the sheeter, until it is about 1/8" thick and wide enough to cover my cake completely. I use confectioner's sugar to prevent the fondant from sticking and I never flip it over to make sure the outer surface will be perfectly smooth and clean.
Not only is this cake covered
in a layer of fondant, but all
of the decorations are fondant
as well.
   
      This next part takes a little practice. I pick my fondant up and place it over my cake. I usually try to smooth the top down very quickly and then I smooth the fondant over the top 1" of the sides of the cake. It will look like a tablecloth, but if you carefully stretch the fondant while smoothing it against the sides of the cake you can work all the folds out until it is totally smooth without any rips, tears, divots or folds. Like I said, this takes some practice. I find that the taller a tier is, the more challenging it can be to smooth the sides without any marks. I also think it is easier to smooth a round cake than a square cake since it is more challenging to navigate the corners. If you have marks or aren't happy with the layer, you can carefully remove it, re-crumb your cake and try again. Another great hint is to use your decorating elements to hide any flaws you have. This can only do so much, though.

This close up of the house in
process shows how you can
texture fondant.
     Once the cake is successfully covered with fondant you can do all kinds of fun things to decorate it. You can pipe onto the cake with royal icing or buttercream. You an add texture to your cake with quilting, ruffles, crimpers, or an impression mat. You can paint directly onto your cake with an airbrush or by hand with buttercream or food coloring. You can roll out more fondant and cut out shapes, then stick them to your cake. You can also use fondant to make the decorations that will go onto you cake like figures, logos, molded items or even some flowers. It's a great way to make your decorations enjoyable to eat, as opposed to using gumpaste which is edible, but you really don't want to eat it.
 
    I hope I've convinced you that fondant can be a great addition to your cake. I really love working with it. Remember, if you still don't like it, you can just peel it off your slice of cake and stick to the buttercream!

Thursday, July 16, 2015

The Beautiful World of Buttercreams!

These are some of our flavored buttercream icings!
   Let's talk about icing! There are many different types of icings in the world and each has it's own
different taste and application. There are a wide range of different textures and tastes and everyone has their favorite. Depending on where you live, you may be more familiar with one style over another. In fact, if you compare decorating cultures (for example, comparing the US to Great Britain) there can be extremely different approaches to how one should ice a cake and with what type of icing! There are buttercreams, fondant, cream cheese icing, gumpaste, royal icing, pastillage, marzipan, ganache, glazes, and modeling chocolate that can all be used to cover or decorate a cake! (To see some cakes that I've made and decorated with a variety of icings, check our www.frostedfoxcakeshop.com). Today, I'm going to focus on buttercreams and then I'll go over some of the other varieties in future posts.
 
A pre-made buttercream.
Not my favorite style of icing!
    I believe that when most people think about buttercream, they are usually thinking of that super sweet icing that you might find on a supermarket cake. Now, that icing has its place and its fans, but in my opinion, it's just not buttercream. I find it to be too sweet and frequently gritty (it's basically sugar, shortening and a bunch of preservatives and stabilizers). REAL buttercream is made with butter (duh). It should be sweet, but not tooth-achy sweet, smooth, creamy and light. It's best eaten at room temperature so that the icing has a chance to soften, otherwise it can be too much like eating a cold stick of butter. This is an extremely popular type of icing, but did you know there are many different styles of buttercream?
The real stuff!
 
    That's right, there are many varieties, among them "American Buttercream," "Italian Meringue," "Swiss Meringue," "French Meringue" and "French." "French Buttercream" is very rich as it is made with butter, sugar and egg yolks. "Italian Meringue Buttercream," French Meringue Buttercream" and "Swiss Meringue Buttercream" are made with a meringue base (egg whites) into which sugar and butter are added (they are named after the type of meringue used in the icing). Of course, you can leave it to us Americans to come up with the simplest style of buttercream, in our version, usually the butter is creamed with confectioner's sugar and then sometimes milk is added to make it smoother.
Yolks form the basis of French
Buttercream.
 
   Why would you need so many different styles of buttercream? Well, each one has different pros and cons. French buttercream is very rich, it's delicious but it can be too rich for a strongly flavored cake. It also has a tendency to be more yellow than other buttercreams thanks to the presence of the egg yolks in the pate a bombe base. It also has a tendency to be more susceptible to heat. It works best as a filling for cakes or other pastries that use buttercream. Another drawback to french buttercream is that it can be more difficult to make than other versions since it requires making a pate a bombe. It is also possible that the egg yolks will not reach a "food safe" temperature so it could be potentially risky in the same way that eating eggs over easy can be a little risky for certain populations. Given all the cons, I don't really make this buttercream, it's just not quite what I look for in an icing.
Our chocolate icing is
an American Style
Buttercream.
 
    If we swing the difficulty pendulum in the opposite direction we come to "American Buttercream." This is what many of our elders might have made for our birthday parties. You simply beat butter until it is creamy, add a whole lot of confectioner's sugar, a little vanilla, a little milk, then beat the crap out of it until it is smooth and silky. This buttercream is quite tasty, although it is definitely quite sweet. Not as sweet as the store bought stuff, but still pretty sweet. It is pretty easy to work with, but is also quite susceptible to heat. The chocolate icing we make is a variety on this style of buttercream (we add cocoa) but when it comes to our vanilla buttercream I like to make a meringue based version.
With Swiss Buttercream you heat
the egg whites and sugar together
over a water bath.
   
    There are three meringue based buttercreams. "French," "Italian," and "Swiss;" each are named after the style of meringue used to make the buttercream base. In all three versions, a meringue is made, and then room temperature butter is added in and whipped until it is silky smooth. You start with this airy meringue, then start to add your butter, and eventually you have this "oh crap!" moment when it breaks and it looks like it will never work, but then it magically starts to come back together and form a beautiful, smooth emulsion! In the "French" style, the you simply add dry sugar into you egg whites as they whip. The two big drawbacks of this style are that it isn't as stable as the other two AND since the whites are not cooked, it's not really up to US food safety standards.
 
In an Italian Buttercream the 240 F
sugar syrup is poured into the
egg whites to make a stable meringue.
 "Swiss Buttercream" is made by heating the egg whites and sugar together over a water bath until they reach a food safe temperature, then you whip the whole thing until it's voluminous and cool to the touch. This is the most food safe version of buttercream, but can take a little longer to make and is slightly less stable in heat than it's cousin, "Italian Buttercream." "Italian Buttercream" is the most stable buttercream because it is made from the most stable meringue. In this version, the sugar is cooked with water to the 240 F, then you pour the hot syrup into the whites as they whip and it forms a very strong meringue. This is the trickiest method to make, but I think it is worth it as the icing is great for decorating and it is food safe, delicious, sweet, and has a great mouth feel. This is my preferred icing and it is how I usually make my buttercream.
   
   All of these buttercreams can be flavored in a wide variety of ways. You can use jams, extracts, liquors, custards, pastes, chocolate and pretty much anything else as long as it can be blended into a high-fat emulsion. I do want to note, however, that when you add flavors, it can change the texture of your icing causing it to break or loosen if you add too much. You can adjust the consistency by adding more confectioner's sugar of liquid, but it's a delicate balance. You can see the full list of our flavors on our website www.frostedfoxcakeshop.com for some ideas.
 
Food colors can be added to make
the buttercream any shade you want!
 Real buttercream is naturally off-white or ivory thanks to the butter, but it's a really beautiful natural, soft shade.You can also color your buttercreams almost any shade in the rainbow! I find that gel colors work the best for buttercream as watery food colors don't really mix into the emulsion very well and give a spotted affect. Also, it's worth mentioning that if you are going to deep, intense colors, they can often come off on your guests lips as they eat, so fair warning if you are looking for an all-black wedding cake, you may be in for a surprise when you see your wedding photos!
   
   All true buttercreams have one major enemy, heat. They all have the potential to melt if they are being held in a hot environment like, say, an outdoor summer wedding. However, some of them are a little more stable than others in heat. They can also be tricky to work with in a hot kitchen where than can be loose and kind of frustrating. This is why many people use shortening as a base, it's more heat stable, but I just don't think it tastes as good as butter or has as nice a mouth feel as real butter. Another potential drawback for buttercream is that it can be a challenge to create a perfectly smooth, blemish-free surface. Also, there are some techniques that just can't be done with buttercream.  While I believe that buttercream is one of the best tasting icing options,  it does have its limits.  That's why it's important to consider using the other icing options in conjunction with the buttercream. Next time, we're going to talk about that controversial F-word: FONDANT!

Monday, July 13, 2015

So You Need to Order a Specialty Cake....

This is one of favorite
new designs for our
foxy bakery!
      I thought I would talk about little bit about the process of designing and creating a cake for a special occasion. There are many factors to consider when it comes to the final product but here I'll break down some of the main ones that you and your cake decorator should consider when meeting. Now, this may vary from decorator to decorator and I can only speak to my own experience and process when designing a cake. This should still work as a general guideline for planning your party cake.
 

Examples of cake serving size suggestions.
   One of the first things to consider when planning your cake are some of the basic logistics of your event. I'll need to know when your party is, how many people you want to serve with the cake and if there are any dietary concerns. You also may want to start thinking about what flavors you want to select for each tier. These basic logistics will help me guide you towards an appropriately sized cake for your event and it will also help me to recommend the right exterior icing. Sometimes fondant can be a great choice if it will be a hot day or if the size and shape of the cake will need some extra support. I also want to make sure you have realistic expectations regarding the size of your cake. While we're at it, I will usually be able to give you a price estimate so that you know what to expect before we sort out all of the details.
Some of my design doodles for some
display cakes.
   
   Now that the logistics are out of the way, we can get to the fun part, the design! I usually recommend that my clients take a look through our photo albums and our website to start getting ideas. From there, you can delve deeper into the world of online searching via google or pinterest or any other search engine you enjoy. One caveat, sometimes there can be almost too much out there and it can be hard to make decisions. Try to narrow it down to a few designs, and remember, you can always change things or pick and choose design elements from different cakes!
I made this cake for an "Up"
themed baby shower for a
friend of mine.
   
    When you come in, usually I'll look through your pictures with you and we will start to build your cake design. We'll hone in on design elements that you want, like borders, colors, piping, fondant details and overall look.  A different approach is to bring in any decorations you are using for your party. Invitations, plates and napkins can be a wonderful jumping off point for a design. They can give me ideas about color, motifs and characters. I'll make some recommendations if I foresee any concerns, but it really is a joint process.  My goal is to exceed your expectations and make sure that the design will flow beautifully and also fit into your overall event scheme.
 
I made this gumpaste Peony several days before bringing
it all the way to Cuba for my brother-in-law's wedding.
     Once the order is placed, I generally start making any decorations that will need to sit and set up. I'll start a few days before the cake is going to be picked up making things like fondant bows, gumpaste flowers, sugar veil lacework or anything else that will get sculpted and will need to set for several days before being added to the cake.  Then the cake will be baked, crumb-coated, iced and most of the decorations will be added. Sometimes, I will hold off on adding the final details until just before the cake goes out if there is the possibility that the decorations will be adversely affected by being in a humid refrigerator.
     Any given cake usually has several hours of work put into it. From the time spent designing the cake with the customer, to the hours put into baking it, not to mention the time spent actually making and applying the decorations. Each cake is a labor of love and we work really hard to make sure that our customers will love their cake.
   

Monday, July 6, 2015

Butterfly Baby Shower Cake - Our first cake of the week!

    I'd like to do a feature on this blog called "Cakes of the week" where we can showcase some of our favorite cakes that we have made in the past week. Since we aren't really open in our shop, I've been making cakes from friends and family on an unofficial basis. So, that means I haven't really been making a whole lot of cakes yet. This past week, however, I was lucky enough to work with a great client, a friend of a friend, who was planning her baby shower.
    She contacted me through our Facebook page, then we met to talk about flavors and design about a month prior to her event. She selected our red velvet cake with a cream cheese icing as the filling. She was looking for a pretty tiered cake to serve to a medium sized crowd, so we decided on a two tiered cake with white fondant on the outside. The fondant provides support and a little bit of insulation against our hot Philly summers rather than just buttercream or cream cheese icing alone, which could easily melt!
 
Baby C's butterfly cake
 The color scheme of her party was pinks and oranges and she wanted a butterfly theme for her cake. We decided on a white cake with pearlized fondant borders and a cascade of butterflies flying up the cake going from strong pinks and oranges to more pastel towards the top. The cake would also feature a cute little "baby" banner as well as the family's initial on top.
    I looked into getting some pre-made butterflies that I could alter to fit the cake, but in the end I wasn't happy with my options and decided I would be able to get a better variety of colors, size and styles if I made them by hand. (I admit, it's also a point of pride that I prefer to make my own decorations rather than use pre-made ones, so I was feeling a little weird about using the pre-made butterflies anyway). So, early on in the week I set to work on making the butterflies, some small flowers and the "C" to top the cake.
Allowing the Painted Butterflies to Dry
     I cut the butterflies from colored gumpaste with cutters and by hand to get a range of sizes. Then I wired some of them and allowed them to set up against some old apple pads to get a more 3-D quality. I let them dry for several days, then I dusted them with some different petal and luster dusts for a richer color and hand-painted the black and white details. The last step to the butterflies was using royal icing to pipe their little bodies so that they wouldn't just been a pair of wings! The "C" cake topper was molded by hand and the small cupped flowers were cut and rolled to have a slightly 3-D feel to them. Everything was left to dry until I was ready to decorate the cake.

A close-up showing the "C" topper,
the "baby" banner and butterflies

  I usually finish my cakes the day before they are due. Particularly if they have an early pick up the following morning. I just prefer to work with a little buffer time just in case they are any unexpected complications. So, on saturday morning I iced my two tiers with white fondant (it sits on top of a crumb coat of vanilla buttercream so that the fondant is perfectly smooth and the buttercream serves as the main flavor on the cake.) Then, I assembled my cake, added the borders and made my little banner to go directly against the top tier. Next, I started to apply my butterflies and small flowers by using vanilla buttercream as the glue. The final step was adding the "C" to the top of the cake and perching a tiny butterfly on top.
Butterfly Baby Shower Cake
   I was really happy with the way this cake came out. The hand painted butterflies definitely took a long time to decorate, but I think they were really worth it. I was a little nervous that with the heat and humidity of summer the gumpaste would start to flop in the refrigerator, but it held up strong! I hope the client enjoyed it and had a wonderful baby shower!
    If you are planning an event in the area and would like to get information about ordering a cake from me, get in touch through the "contact us" page on our website. Or, you can message us on Facebook. While we are not officially open and do not have a commercial kitchen at this time, I would be happy to give you some options available to friends. Also, for kindly bearing with us about this, we are offering a discount from our normal retail rates.
 

Thursday, July 2, 2015

Our Little Fox Den (i.e. the Cake Shop)

    I've talked about the importance of baking from scratch as well as what we intend to offer on our menu. Today, let's talk about what our bakery will actually look like when you come visit us!
Germantown Ave. Spans much of North Philadelphia
    First off, we are located on Germantown Avenue in Mt. Airy. For any of you who are not familiar with the area, Mt. Airy is in Northwest Philadelphia. It is a famously historic and diverse neighborhood but it is also one of those places that can be a little inconsistent when it comes to the tone from block to block. Our shop is in the "south end" of Mt. Airy bordering on Germantown. It's a section that can definitely use a little love but it has great residents that love their local businesses. There have been some great things happening in Mt. Airy and Germantown recently. We want to be part of that positive change and so we want our shop to be as beautiful and welcoming as possible.
Ben's awesome logo
   Since our shop is the Frosted Fox Cake Shop, you can imagine that foxes were a big source of inspiration when it came to our design scheme. We are lucky enough to have very talented friends and family offering to help us with our bakery. We started with our logo as a basis for our brand design. My sister Katie's boyfriend, Ben Girmann, (a wonderful designer, illustrator and student of animation) offered to help us with this task. He composed a series of options for us including, at my sister's suggestion, a fox chef holding up her cake. Well, she was just perfect and now we proudly adorn our windows, uniforms and boxes with the logo.
Felted animals are so Cute!
    For our interior space, we worked with a great design group, Ennis Nehez, who came up with a rustic, woodsy feel that would also work with our more utilitarian equipment needs. They came up with a great green, gray and copper color scheme that we can't wait to see in person. We'll have some beautiful custom tables and counters that are still being imagined and re-imagined by our contractor, Duck Rabbit. We are also collecting some great, whimsical decorations for the shop. Everything from framed portraits of animals to a large felted fox we are having made just for us byYvonne's Workshop. We'll have a spot for people to sit and enjoy their purchases while watching us decorate in our open decorating kitchen.
Some of these very boards have been turned into our
gorgeous platters!
   Now, even though we are putting a lot of effort into making our shop a beautiful and comfy space, the real focal point are our desserts. They first thing you'll see will be our ever changing window displays  featuring our cakes which will pull you into the shop to take a closer look. Then, once you enter, you'll be greeted by a line of delicious cookies, bars, treats and cakes. Our ready-to-take cakes will have a soft, textured icing that will fit in with our rustic aesthetic. They'll be sitting on live edge wooden display platters that are being made for us by our dear friend Jesse at Harrington Design Studio. He even put up with us "helping" him to make them!
   We've been so lucky to have such wonderful people helping us to realize our dream bakery. Since work has just started on our shop, the design will be an evolving process. I can't wait to see how it will all turn out. I know it will be gorgeous, warm and comfortable. We will post photos of our shop as it evolves from its previous life as a hat shop into its future as a Cake Shop. If you want to keep up to date with everything we are working on, follow us on Facebook and Instagram to see more of what we are doing.